
Click here to return to the home page.

Selling separate components from the GT-101 began when a customer wanted to build a seven channel amplifier. He bought 7 amplifier modules, 3 power supply regulators, and 3 power transformers. The light-bulb over my head went on...Maybe lots of other DIY'ers would like to build special amp configurations in their own custom enclosures. By offering the modules and parts, everyone wins.
Do you have a custom amplifier project in mind? This is the place. Have questions? Send email to dan@updatemydynaco.com.
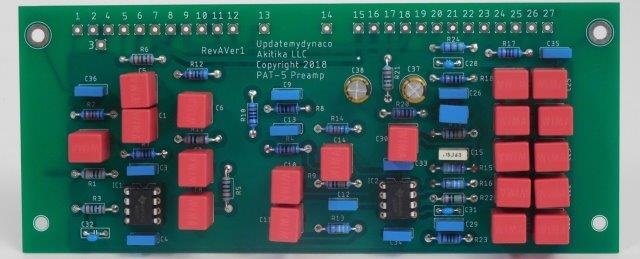
If you have an old PAT-5, the capacitors are probably pretty well shot. You could replace them, and that would help, but with this kit you'd be doing better. Instead of electrolytic caps, all the caps in the signal path are film caps. That's as good as you can get. It's hard to get a lot of capacitance with film caps, so we've used lots of them in parallel to get the needed size while preserving the linearity.
But that's not all! (Sorry if this is starting to sound like a late night UHF TV commercial...It's just really cool!) The PCB design is double sided, with a ground plane. It's completely compatible with all the existing controls, pots, and push-buttons. It uses modern low-distortion, low noise opamps, better than anything available when the PAT-5 was born. This will take a PAT-5 from darn good, and bring it all the way to crazy-good.
The kit contains parts and PCB's for both channels, as well as the niceities you've come to expect...wire labels to make the installation go smoothly, keps nuts to make reassembly easier, and a manual that lays everything out in a clear, step-by-step fashion.
The kit is in-stock and shipping! Order your kit today...and be sure to look further down the page...We supply the kit with NE5532 Opamps, used everywhere in recording studios. Still, you can even take this further, and choose different opamps, and install sockets if you want to do experiments.
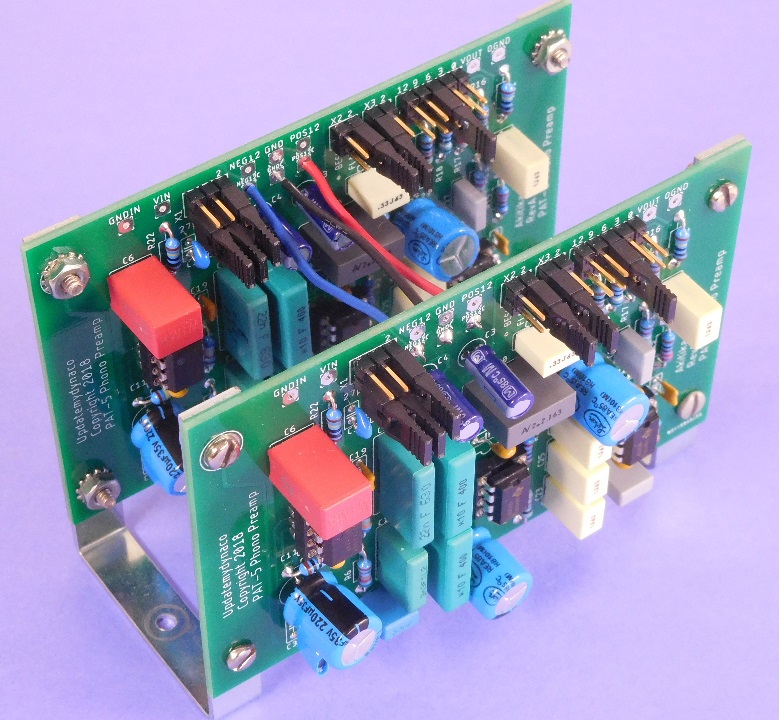
The PAT-5's original phono preamp can be greatly improved upon. We've made a new kit that drops right in to replace the original phono preamp PCB's. It has lower noise. It has more accurate equalization. It has gold-plated jumper-selectable capacitive loading, gold-plated jumper-selectable gain (30, 33, 36, 39, and 42 dB at 1 kHz), and gold-plated jumper-selectable high-pass filtering. It has all the great things that have made the PHONOZ preamp for the PR-101 a favorite of audiophiles the world over.
Each kit contains two circuit boards and all the parts you need for both a right and a left channel of moving magnet phono preamplification. These boards fit on the same mounting brackets as the original phono preamps, so they'll drop right in. You will need to use Rev E (or later) of the Updatemydynaco upgraded power supply for the PAT-5. If you have Rev D or earlier, please also order the PAT5EUP kit listed below.
Installing this upgrade for the phono preamp will give you a world-class phono preamp at an amazing low price. Combine it with the PAT-5 line stage upgrade, and you'll get multi-thousand dollar sound at less than a tenth of that amount. Like all Akitika/Updatemydynaco products, we've tried to hit the sweet spot. But we know that some of you like to go even further.
To that end, we offer the following optional upgrades
The kit is in stock. Order your kit today!
This is the original improved replacement power supply for the PAT5 Preamplifier. It's completely compatible with the original preamp, providing both +/15V and +42 supplies. It can also be wired for either 120 Volts or 240 volts. A good power supply is critical to good sound, and the original PAT-5 power supply could be greatly improved. This new power supply has 100 times better regulation and 100 times less noise. You can find more information on the PAT5 Pages.
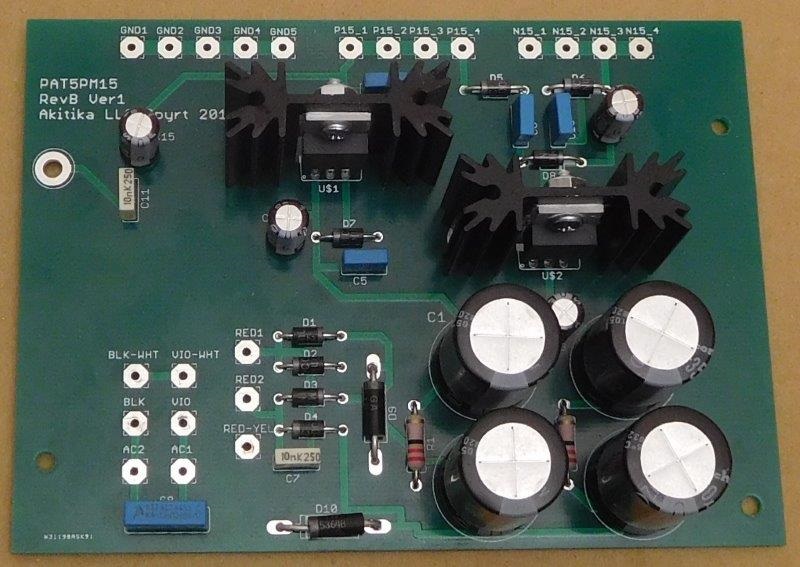
PAT5PM15 – Compared to the PAT5PWR, the PAT5PM15 power supply runs cooler, saving about 3 Watts. Here’s how. The stock PAT5 uses +/-15 volts for the line stage and +42 volts for the phono stage. If you replace the original phono stage with the Updatemydynaco phono stage, you only need +/-15 volts. That lets you re-wire the power transformer, letting everything run much cooler. The only downside? This power supply only runs on 120 volts. If you need to run on 240 volts or need 42 volts for an original phono preamp, then use the PAT5PWR.
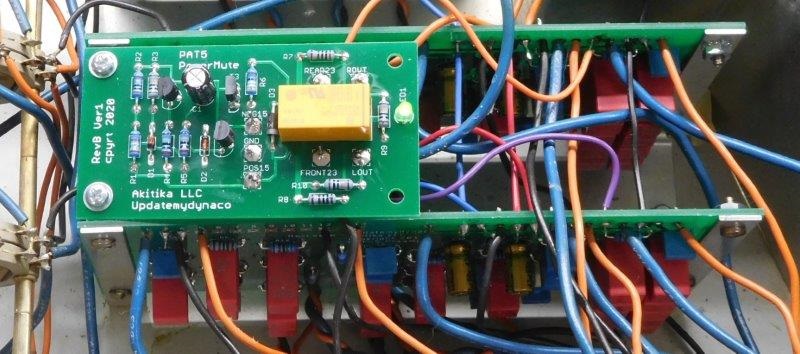
PAT-5 preamps are perpetually powered. Yes...there's a power switch, but it only controls the convenience outlets.The preamp circuits are always on! Dynaco changed to the always-on power wiring shortly after the PAT-5 was introduced. It was the cheapest way to avoid power up and power down pulses. Unchecked, these pulses, passed through a 200 Watt per-channel amplifier like the Stereo 400, could turn woofers into toast.
Updatemydynaco makes the power muting board that the PAT-5 should have had all along. Just follow the directions in the manual as you build and install the PAT-5 Power Mute Kit into your PAT-5. The kit keeps the preamp's outputs quiet until the turn-on transients have passed. At turn-off, or any loss of power, the kit mutes the outputs quickly, before the power supply voltage sags enough to cause problems.
The kit is in stock and ready for delivery.It's compatible with Updatemydynaco modules. Assembly and installation are quick and easy. Order your kit today, and you'll have a great project for the next rainy day.

PAT-5 with the new jack kit.
This kit is for the PAT-5. Its RCA jacks can get pretty oxidized and just plain crummy with time. The picture below shows an SCA-80 with original, oxidized jacks. That oxide makes it hard to get a good low resistance connection, which can lead to lots of extra noise and distortion. You can replace all your RCA input and output jacks with this kit, get great connections, and great sound. Check out the pictures above or below to see the beautiful gold plated RCA jacks that are part of this kit.
At just $21 plus shipping, the price is practically a give-away!
Note: It's easy to change the jacks if yours are held in by screws. If they're held in by rivets, think carefully before purchasing this kit. The rivets can be drilled out, but it's a lot more work!
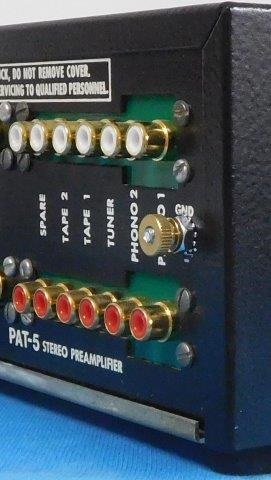
The original connection for the phono wire ground was a sheet metal screw into the chassis. The "cheese" factor is a bit high on that arrangement, and you can make it a lot better for just $1.99. Remove the original screw, and possibly open the hole a bit. Then insert the 1/2" sem screw from the inside of the chassis. The built-in lockwasher grabs the chassis to make a good ground connection. Now install the keps nut from the outside. Once again, the built-in lockwasher makes a good ground connection. Top it off with a knurled brass thumb-nut and you have a great ground. Why is it great? Because now you can securely connect your turntable ground to your amp or preamp without having to find or fiddle with a screwdriver!
Some audio guys love to experiment, swapping opamps and listening to music far into the night. This kit provides 4 high quality, gold plated, 8 pin DIP sockets so you can indulge your desires, and swap till you drop. Warning: Although it's MUCH easier to swap socketed ICs than soldered IC's, it's still tough to do when the Line Stage or Phono Stage PCB's are installed in a PAT-5. However, if you want to preserve that option in the realm of the possible, then get this kit. Later kits on this page offer popular alternative opamps to populate these sockets.
LME49720 opamps are very well regarded. Do they sound better than the NE5532's that come stock with the PAT5 Line Stage kit? Find out when you buy this kit. It contains 4 of the famous LME49720 dual-opamps in 8 pin DIP packages. Plug them into your PAT-5 Line Stage or Phono preamp boards, and see which ones you like best. Will it be the stock NE5532's, these LM49720 opamps, or something else? Note that you can also use these opamps in the high level positions of the PAT5PHONO kit.
OP2134 opamps are also very well regarded. They have JFET inputs, rather than the bipolar transistors you'll find in the LME49720 opamps. Do they sound better than the NE5532's that come stock with the PAT5 Line Stage kit? Find out when you buy this kit. It contains 4 of the OPA2134 JFET input dual-opamps in 8 pin DIP packages. Plug them into your PAT-5 Line Stage or Phono Preamp boards, and see which ones you like best. Will it be the stock NE5532's, these OPA2134 opamps, or something else? Note that you can also use these opamps in high level positions of the PAT5PHONO kit.
The 5534's that are stock in the phono preamp kits are amazingly quiet and low distortion single op-amps. Quite frankly, it's hard to find a quieter opamp. However, there is one. The OPA1611 has even lower noise voltage and current than the 5534. However, the OPA1611 only comes in surface mount. Because of that, we've pre-assembled the OPA1611s onto surface-mount to thru-hole adapters. You can use these in either the PAT5PHONO kit, or the PHONOZ kit for the PR-101. These opamps are pretty expensive, but they are a little quieter than the 5534. Quite frankly, the difference isn't big, so I thought it best to let you see it for yourself. The following figure compares the noise with a 5534 to that of the OPA1611 in the PR101 circuit. In the range from 100 Hz to 2 kHz, the OPA1611 is between 0 and 6 dB quieter than the 5534. Below 100 Hz, the 5534 is still quieter. Since noise is integrated over frequency, the OPA1611 will overall be quieter.

Please note that the pins for these adapters are too big to insert into a socket. Because of this, you'll have to insert these directly into the PCB. Note that these can be also used in the PR101 phono preamp.
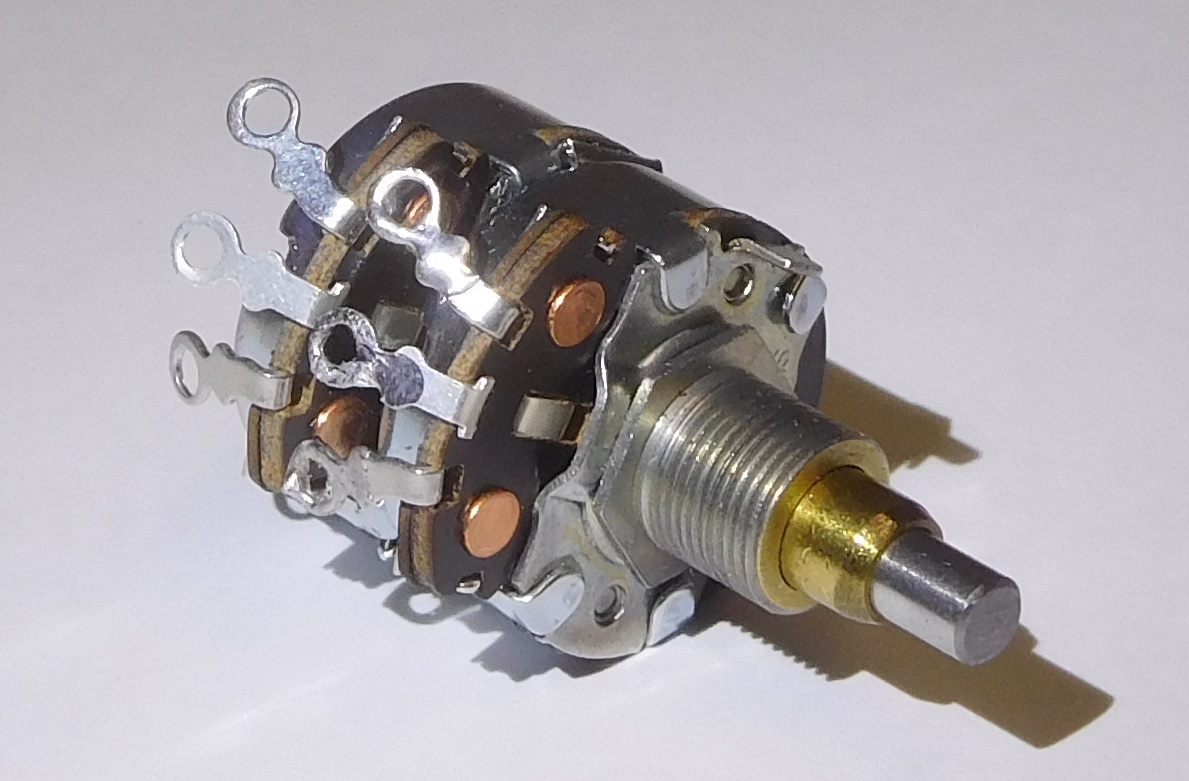
The tone control pots for a PAT-5 seem to be made from pure unobtanium. It's a dual pot, with dual concentric shafts, and a special taper. They just don't make them anymore! But, I have commissioned a supplier, and worked closely with them to get all the details right. The result? These are drop-in replacements for PAT-5 tone control pots. The PAT-5 uses the same kind in both the bass and treble controls. We've set up special pricing for you, where you get a break when you buy two pots. Make your PAT-5 operate as smoothly as it did just after you built it with these beautiful new tone control pots.
This item is in stock, but quantities are limited, so order now!
The original PAT5 balance pot is a custom value that is no longer available. The replacement kit we offer does a pretty good job of replacing the original balance control, although the replacement has about 3 dB more attenuation. This is typically never a problem as the PAT5 has a lot more gain than anyone ever needs. The replacement gives you a quiet, accurate, low distortion replacement for the original control.
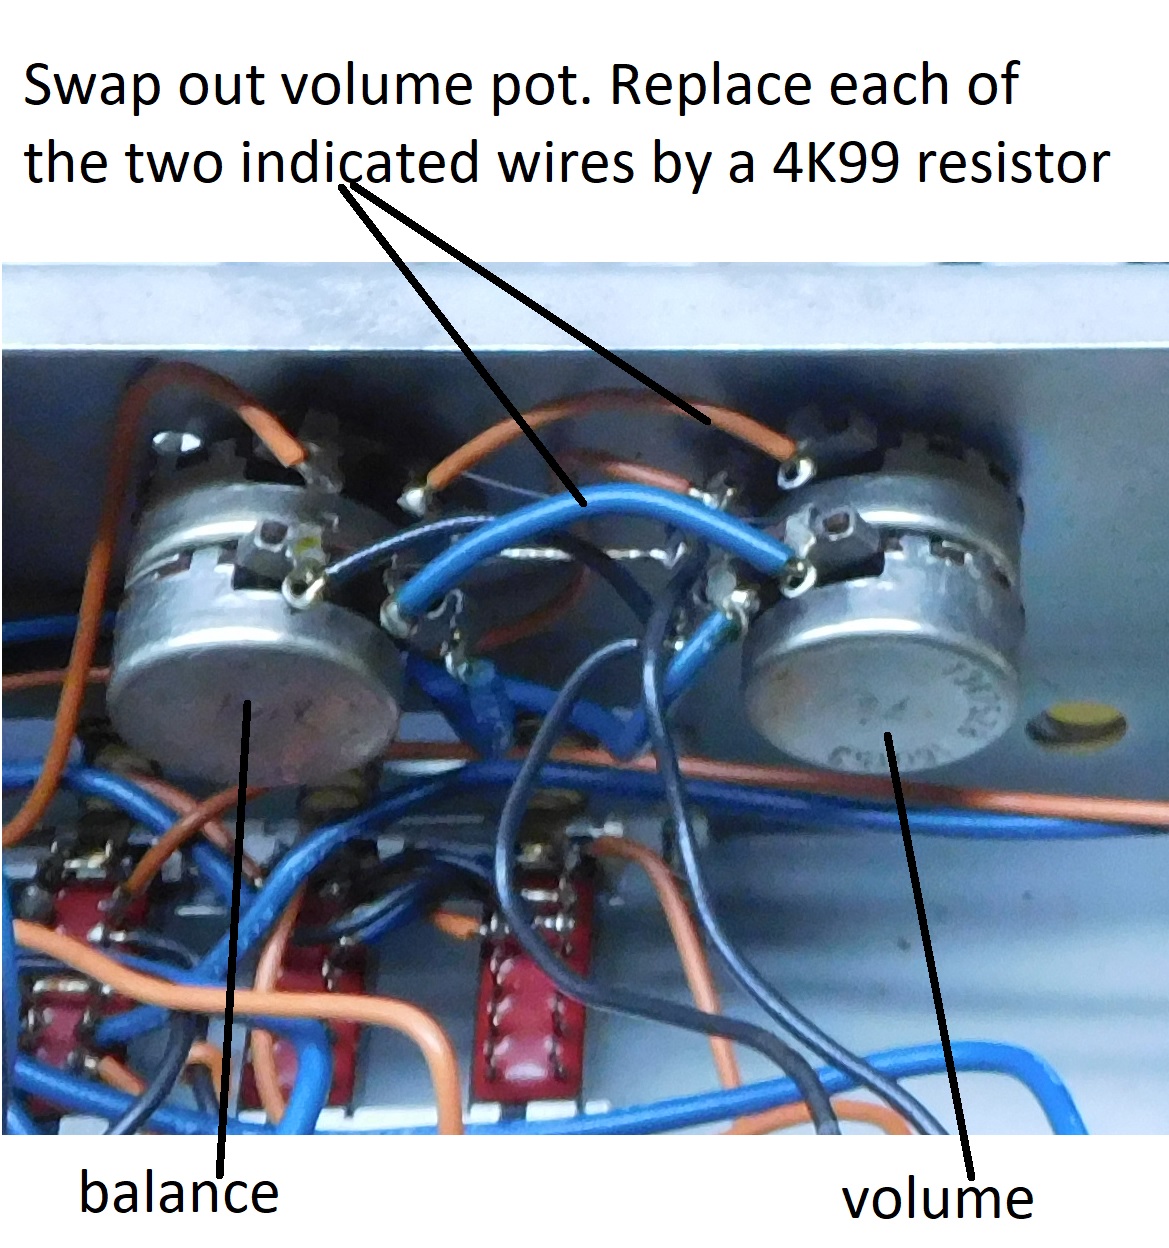
The original PAT5 volume control pot is a custom value (15K) that is no longer available. The replacement kit we offer provides the same high quality dual audio taper pot used in the GT-102/104/108 power amps, along with a pair of 4.99K 1% metal film resistors to make the adaptation complete. The replacement process is quite straightforward, described in the PAT5 Volume Control Replacement manual.
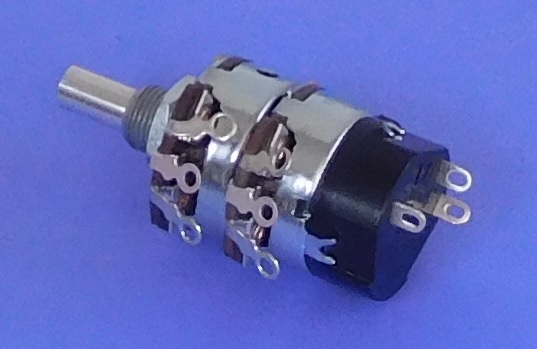
The FM-5/AF-6 combined the stereo volume control and power switch in one control. Fully counterclockwise turns the power off. Just a bit clockwise and the switch turns on, and then the volume increases as you go further clockwise. The pots both have the 20K audio taper called for in the manual. The part drops right in, a perfect replacement for the original. And most importantly, it's in stock for immediate delivery!
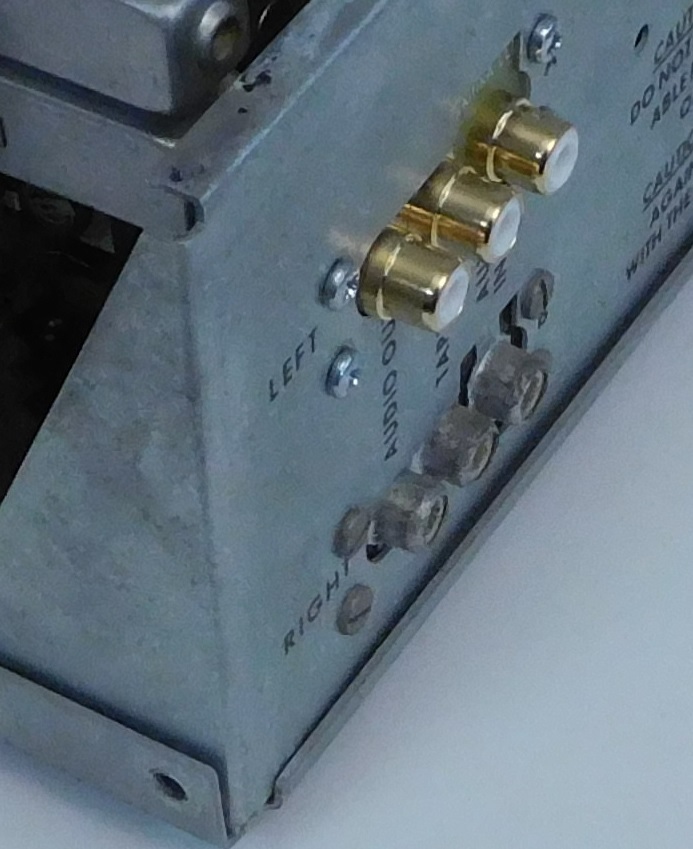
The picture (above) shows how bad the RCA jacks can get. The bottom row of RCA jacks (for the RIGHT channel) are the original ones. The top row of RCA jacks (for the LEFT channel) are gold plated and new.
This kit contains
This is a quick and easy kit to install, assuming that your RCA jacks are held in with screws, not rivets. It will make a dramatic difference in the quality of the connections between your tuner and the rest of the system. Order your kit today!

An original cartridge lamp with the end caps removed. Make sure to save the end-caps. New LED-based lamp uses recycled end-caps
The original dial lamps for the FM-5 were completely custom. Their form is what is generally know as a "cartridge lamp". It looks like a 3AG fuse, but it's longer and thinner, and it's a light bulb, not a fuse. Of course, these original lamps are totally unavailable. This kit recycles the old end-caps. You'll combine your old end-caps with a brand new pre-built small surface mount PCB that has LEDs to replace the original lamps. The kit includes 2 assembled PCBs, enough to replace both cartridge lamps. The LEDs should last much longer than the original incandescent lamps. They'll restore your FM-5 or AF-6 front panel to its original luminous loveliness.
The surface mount PCB comes pre-built and tested. You'll add one thru hole capacitor (supplied) as you finish the assembly by transferring end-caps from your old cartridge lamp. This kit provides a set of two replacement lamps.
Limited quantities are now in stock!
TI is shipping LM3886 power amp integrated circuits, and we are shipping the most popular upgrade kit for the Stereo 120.
A Pair of Assembled TCK2 channels. Please note: the TCK2 comes unassembled...it is a kit!
The kit comes with thermal compound and the lugs and wire you need to make your Stereo 120 better than new.
The kit that started everyone Updating their Dynacos is now better than ever. It now comes standard with the technology that makes the GT-101 so popular:
Here's the story...practically everyone who ordered the original TCK kit was upgrading it with the 10,000 uF capacitor option. So now, it's included in the TCK2 kit.
The kit includes circuit boards and parts, enough to build a left and a right channel amplifier module to replace the original amplifier modules in your Stereo 120. We supply everything you need, electronic components, PCBs, thermal compound, new hardware, and new wire (you'll also recycle some wire from your old amp modules).
The Assembly Manual can be found here.
You get two assembled and tested updated amplifier modules (with 10,000 uF output capacitors and 0.1% gain setting resistors. You still need to remove the old amplifier modules from your Stereo 120, mount, and wire in the updated modules. We give you all the components and hardware you need to complete the job.
This link lists the Assembly Manuals for the various possible final assembly options. Select one of these manuals to guide you through final assembly, e.g. wiring the assembled modules into your Stereo 120, depending upon whatever other options you may have ordered.
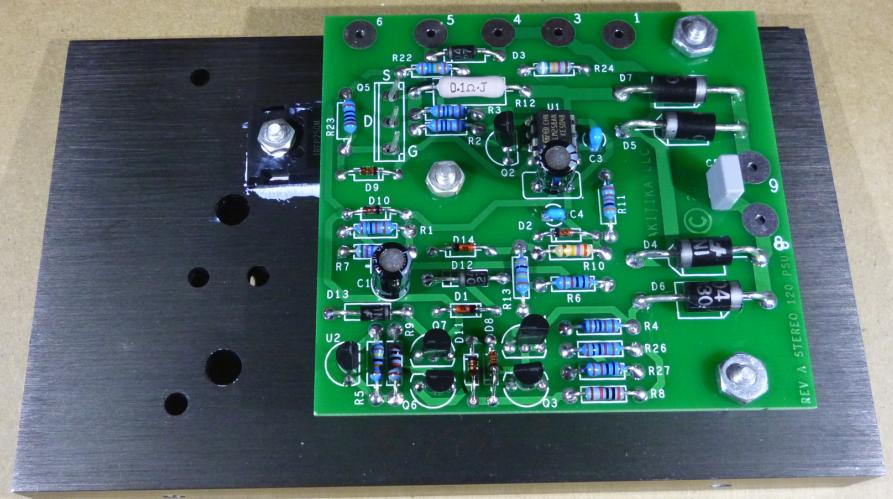
Does your Dynaco Stereo 120 have power supply problems? Our kit may be just what you need. The original Dynaco Stereo 120's power supply was a classic, clever, Dynaco design. Unfortunately, its performance depends upon unpredictable parameters in the transistors. As such, it has a reputation of being a bit temperamental, and a bear to repair.
Our new design drops right in, replacing the PC-15 regulator board and Q9 pass transistor. It re-uses the existing capacitors, power transformer, and heat sink. It has slow start, predictable current limiting, short circuit protection, accurate output voltage, super low output impedance, and low noise. It's compatible with both the original Dynaco Amplifier Modules, and the Updatemydynaco replacement amplifier modules.
The kit contains everything you need to get your power supply into tip top shape...
The picture shows an assembled power supply, but remember...you will receive this as a kit. The kit is easy to build. It uses all through-hole components. The circuit board has been specially designed with generous spacing between all the soldered points, making assembly easy. P.S. - I'm sure that some buyers of this replacement power supply will do so in the search for superior sound, even if their existing power supply works fine.
This is an assembled and tested version of the PSUG kit shown above. You still have to install it into your Stereo 120, but buying in this form may be the right choice for some. We build and test each to order, so shipments happen about 1 week after your order is received.
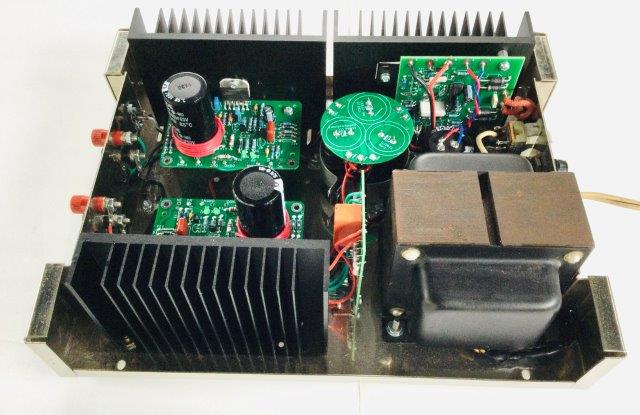
This is the full monte Stereo 120 Complete Rebuild kit. Since introducing this kit, the ST120CRK and ST120CRKL1 sales have gone away. Everyone Has chosen the ST120CRKL2 owing to its increased performance and value. The ST120CRKL2 kit has:
The ST120CRKL2 upgrade is about the best you can do with a Stereo 120 rebuild. It makes its performance very near to that of Akitika's GT-102 power amplifier.
There are a few things that aren't on the list that you might want to add
If you want these additional items, you'll have to add them to your order.
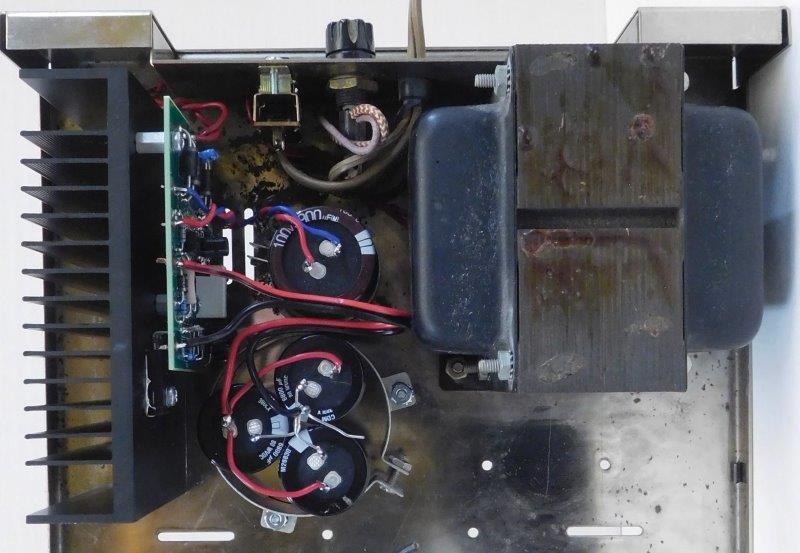
The original heatsink for the Stereo 120 Power Supply pass transistor was another one of those clever Dynaco compromises. It's big enough that in normal operation, everything will hang together. However, in severe service, it will get stinking hot. How hot? With both channels delivering 50 Watts into 8 Ohms at 1 kHz:
Because the heat-sink is so much more effective, we can open up the limiting on the power supply:
Your Stereo 120 will be able to safely deliver more lower frequency power than ever before because this heatsink keeps the power supply regulator transistor so much cooler.
The kit is compatible with the PSUG power supply (not the original Dynaco power supply), and it includes:
You will have to drill one 9/64" hole in the chassis to pass a 6-32 screw, but otherwise installation is straightforward
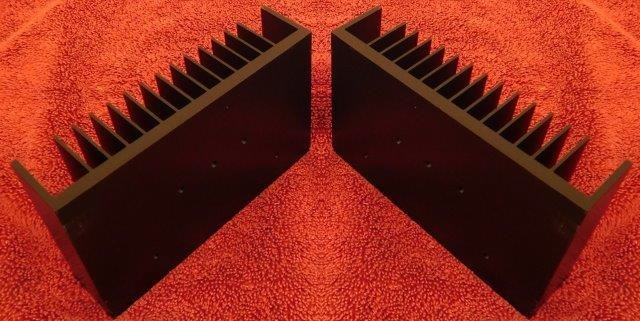
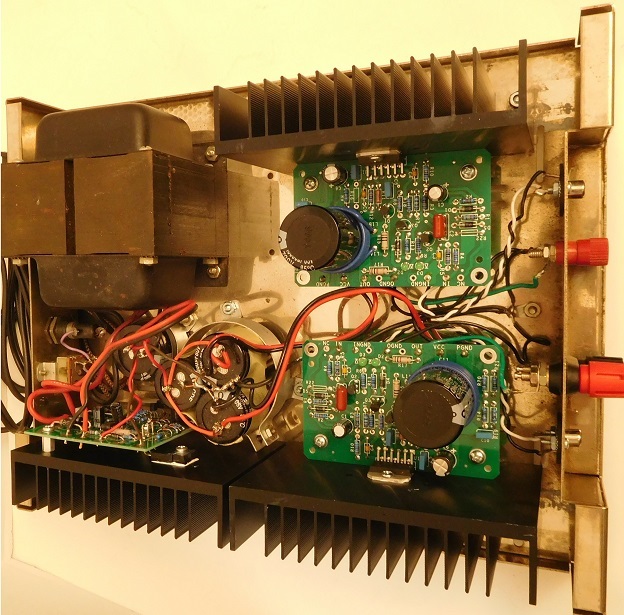
Really big heatsinks for power amplifier modules(left picture) and a Stereo 120 completely outfitted with both RBHSPA for the amp modules and RBHS for the power supply
This pair of heatsinks are the partners of the RBHS for the Stereo 120 Power supply. With these heat sinks, your amps will stay cool for any conceivable home use. That allows you to deliver more power to your speakers. The kit includes:
You will have to drill some 9/64" holes in the chassis to pass 6-32 screws, but otherwise installation is straightforward
You might ask...why do you offer SuperDuper Heatsinks, and the Really Big Heatsinks?
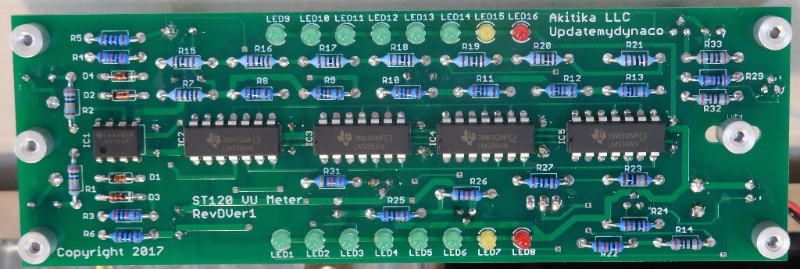
The Stereo 120 Level indicator kit has 8 LEDs for each channel, 6 green, 1 yellow, and 1 red. They cover a 42 dB signal range, giving useful indication for all but the softest listening levels. It is designed to fit into upgraded stereo 120 amp kits where the old chassis-mounted style speaker caps have been replaced. The finished unit has components on both sides of the PCB, and silk screens on both sides guide you as to where everything goes. It won't make your Stereo 120 sound any better, but it will sure look cool! Take a look at this youtube...see what you think:
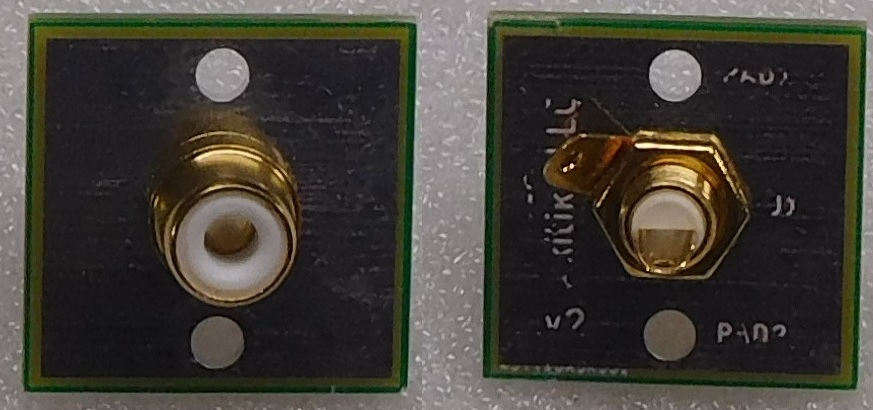
Do your input jacks look oxidized? The ground connection on the Stereo 120 input jacks gets kind of grungy after 40 years. The signal connection probably looks worse, but it's a bit hard to see. All that gunk can cause hum and noise. The RCAJ2 kit provides new, clean, gold-plated RCA input jacks for the Stereo 120 or the Stereo 80. They drop right into the existing mountings. You can re-use the original hardware if you like, but we supply new Phillips head screws and keps nuts. Keps nuts have permanently attached lock-washers. This makes reassembly much easier as the lockwasher can't fall off while you reassemble the jacks.
Note: The RCAJ2 is an upgrade from the previously offered RCAJ, which is no longer available.
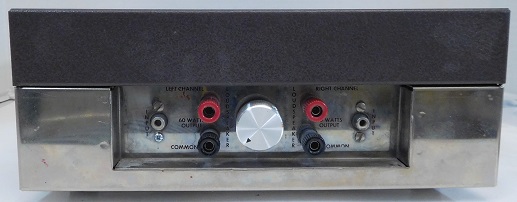
Most times, the Stereo 120 is used with a preamplifier. However, a small but growing group are dedicating a Stereo 120 to a CD player. In many cases, the CD player doesn't have a volume control, so adding the volume control to the Stereo 120 makes great sense. This kit has a quality stereo volume control, shielded cable, and an attractive knob. Installing the kit requires you to drill a hole in the front panel of your Stereo 120. Here's a link to the Installation Manual for the volume control kit.
IMPORTANT NOTE: The volume control will not fit into an amp that still uses chassis mounted C7 speaker coupling capacitors. It only fits into those amps where the power amp modules have been changed to Updatemydynaco modules which have the speaker cap on the printed circuit board.
Everyone loves the look of blue light from their stereo equipment. You can add it to your Stereo 120 (TCK) or GT-101 (AMP101) amplifier module with this least expensive kit of all. It's just two blue LEDs. Make sure to read these instructions so you can put the LEDs in with the correct polarity the first time!
You remove R9 on each amplifier board, and replace it with this LED. The cathode of the diode goes near the big output cap (C11). We sell them in pairs so you can do both left and right modules at the same time.
Picture shows a GT-101 amp module (not included) with one of the two Blue LEDs supplied installed in place of R9
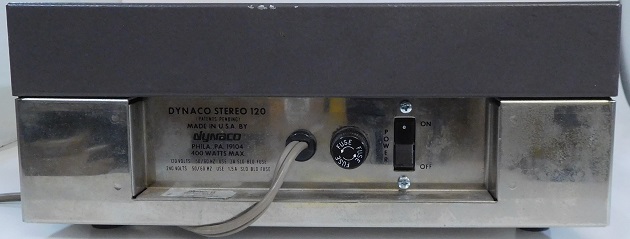
This replacement power switch for the Stereo 120 and Stereo 80 looks exactly like it belongs there. No, it isn't illuminated, but it fits in perfectly with a tiny bit of re-wiring. If you'd like some lights to come on with your power switch, we recommend that you install the BLUE2 kit.
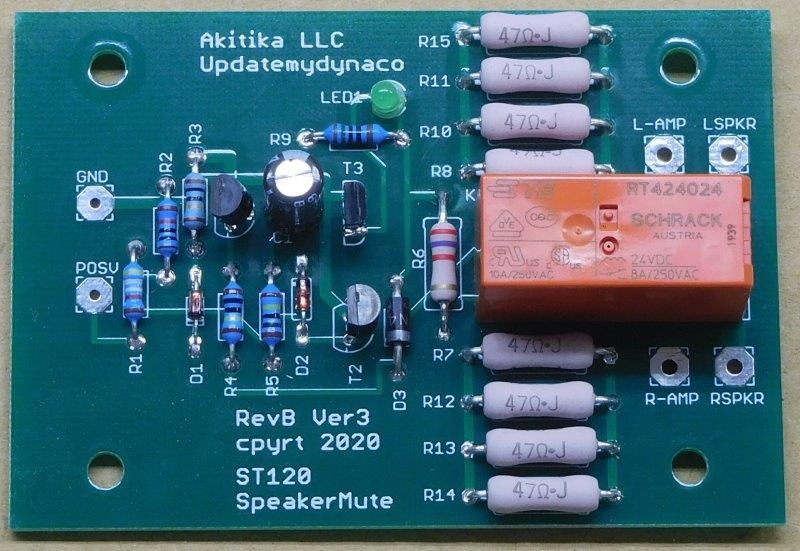
This kit may be the ultimate finishing touch for an upgraded Stereo 120. The Stereo 120 has an output coupling capacitor that has to charge up to its nominal 36 volt DC level. We handle that charging process very carefully, but still, there are small noises on power-up and power-down. This kit adds a muting relay. Upon power up, the cap charges into a load resistor. Once the cap is charged, the relay connects the amp and cap to your speakers. This gives you a very tube-like 20 second turn-on delay. Upon power down, the relay disconnects the amp from the speakers, so turn off is quiet, too.
Electrolytic capacitors don't last forever. The silver capacitors in the background are the originals. The small one on the left was used for C9 (1000 uF at 100 V), and the large one on the right was used for C12 (3300 uF at 100 V).
The two black capacitors in the front are 3900 uF 100 Volt capacitors. They fit nicely into the existing clamps for C9 and C11. The new caps are meant to be used with an update kit. The upgraded amplifier modules don't need C11, so we replace the original C11 with 3900 uf, and then use it to supply the C12 function with upgraded amplifier modules. Of course, you can add a really big C12, as shown below, for even more energy storage.
If you want to replace all the big power supply capacitors and you have original amplifier modules then you'll need to also pick one of the C12 options shown below.
This is a 3900 uF 100 Volt capacitor that is used to replace C9. It fits into the original C9 clamp, and makes a nice bump up in energy storage and output power, particularly at low frequencies. This is a good choice if you're replacing the amplifier modules and have chosen to upgrade C12 to a total of 20,400 uF (see below).
If you're replacing both C9 and C12, and would rather trade some savings for performance, you could instead order the PSRC (see above).
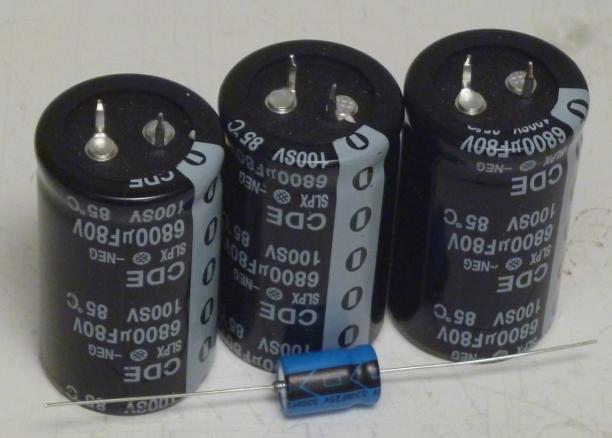
Components in the C12DD kit are pictured above
This table shows the upgrade kit to order, depending upon the modules in your Stereo 120. Each kit has just the right components to maximize the performance of that particular configuration.
| Power Supply | Amplifier Modules | Upgrade Kit | Order |
|---|---|---|---|
| Dynaco | Dynaco | C12DD | |
| Updatemydynaco | Dynaco | C12UD | |
| Dynaco | Updatemydynaco | C12DU | |
| Updatemydynaco | Updatemydynaco | C12UU |
The stock value of C12, 3300 uF, really isn't big enough to get the maximum amount of low frequency power out of your Stereo 120. These kits provide a Dynamite Capacitor Configuration of 3 6800 uF 80 Volt caps. You'll wire them in parallel to produce a mighty 20,400 uF. They also include the ancillary components needed to maintain long life and best performance. View the C12 Installation Manual. Read more background on the dynamite capacitor configuration.
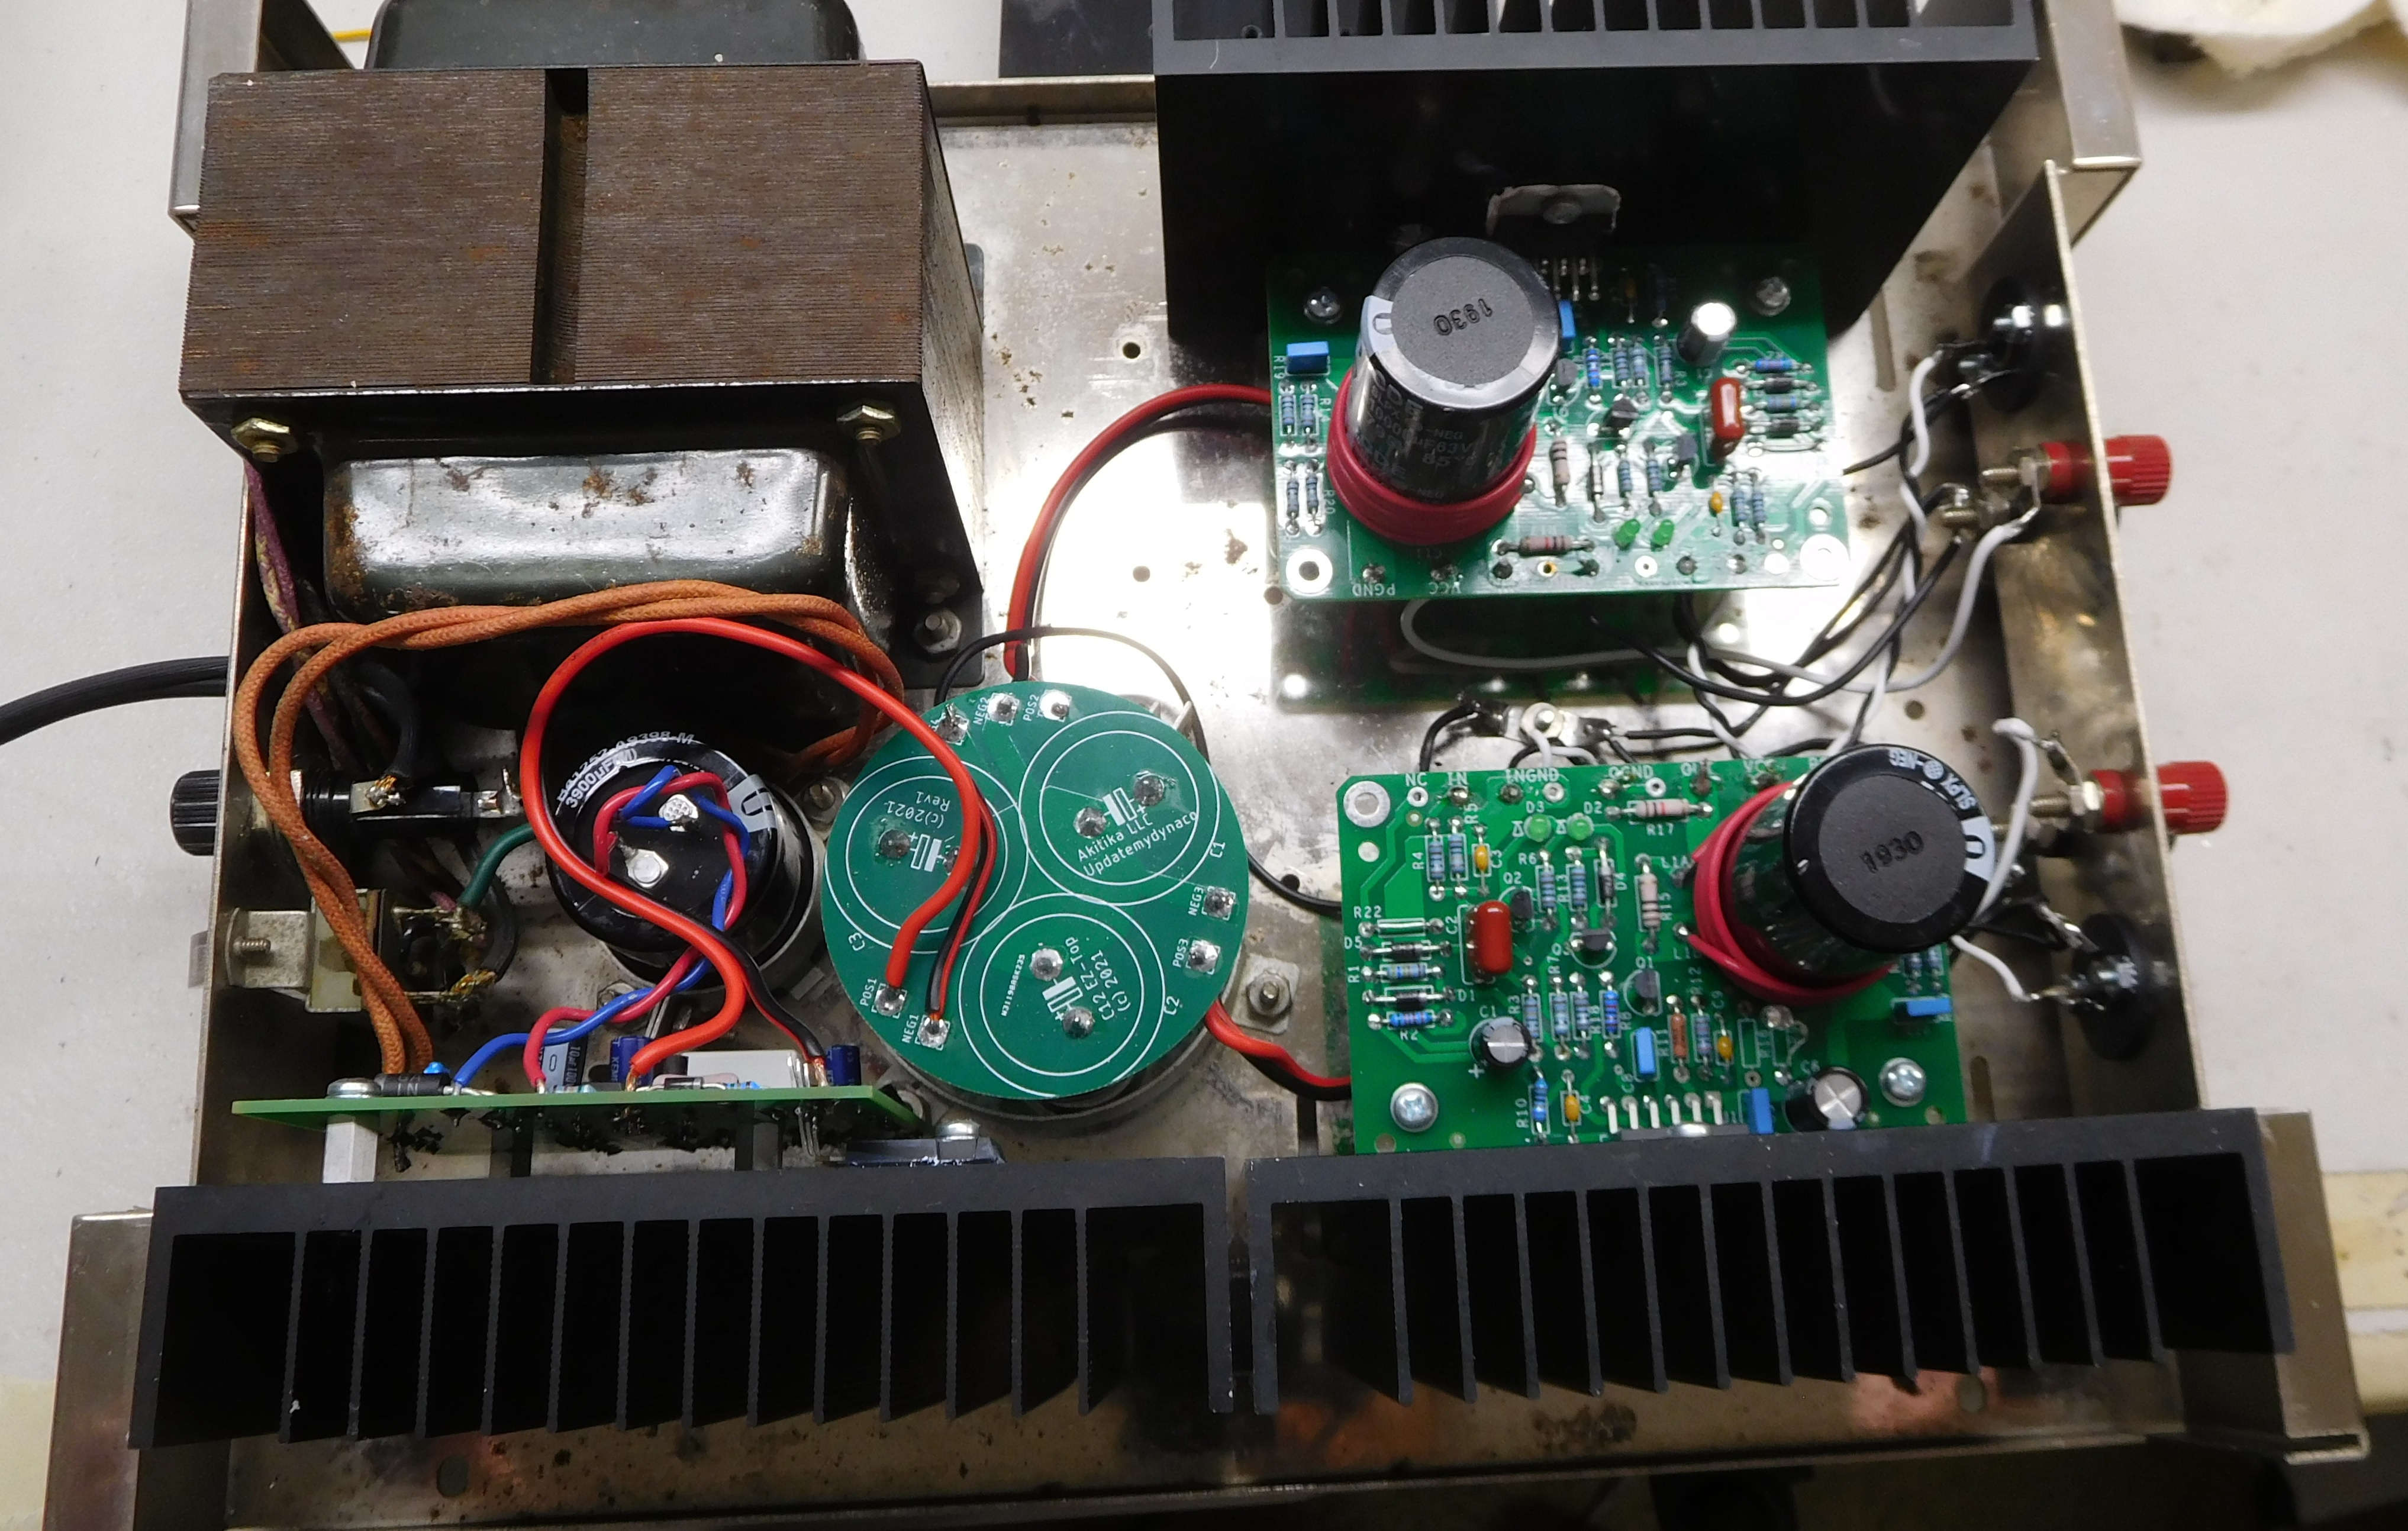
The original C12 kit tied the 3 caps together with a few hand-wrought wire harnesses. That still works great, but the EZTOP kit ties the 3 caps together both electrically and visually. The result is an improved power supply that puts out more bass power, is easier to build, wires more cleanly, and looks better than ever.
You can even use the EZTOP to upgrade your old C12XX arrangement. I pulled the hand-built wire harnesses and knocked the old solder off. I had left the terminals pretty long. It all assembled nicely into the EZTOP PCB.
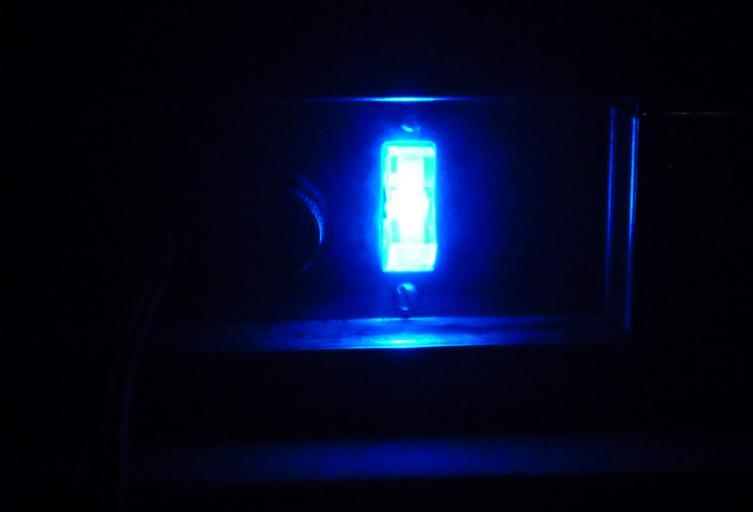
The original power switches have classic orange neon-lamps. Swap them for beautiful blue using our step by step directions... Blue Light Assembly and Installation Manual. Not so many steps in this case, so you should be able to complete a Stereo 120 lamp swap in about 1 hour. This mini-kit gives you eight tiny blue LEDs preassembled onto a PCB about the size of an NE-2 lamp. You install the included dropping resistors and heat shrink tubing to complete assembly, then swap out the orange NE-2 for beautiful blue. You can put blue light anywhere an NE-2 lamp can fit.
See also C7X2C, below, for a brand new version that supplies 2" diameter, 10,000 uF at 100 Volt caps that are a drop-in replacement, with simpler wiring
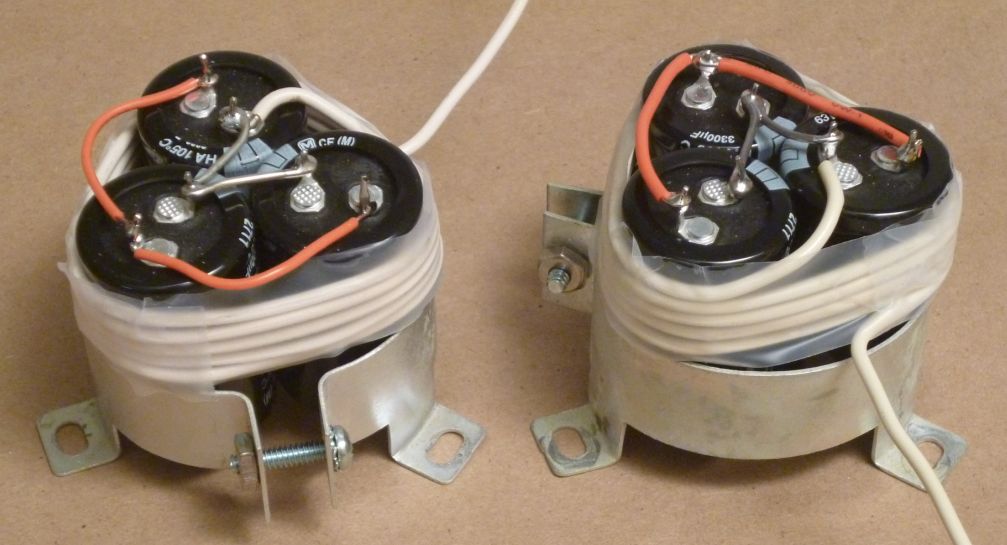
The original speaker coupling caps were a bit on the small side, at 3300 uF. This kit provides 6 3300 uF capacitors that you arrange in a Dynaco Dynamite Capacitor triple. This yields 9900 uF per channel, producing better bass, more bass power, and lower bass distortion. As always, you get a step-by-step manual that guides you through the upgrade process. You recycle the capacitor clamps, some wire and some screws. We've included special hardware in the kit to make the most cumbersome part of the job go more smoothly. This kit works for both the ST-80, SCA-80, SCA-80Q, and the Stereo 120. Take a look at the C7 Upgrade Assembly Manual. It's about a 7 Meg download owing to some hi-res pictures that we think will make the upgrade enjoyable.
Order your C7X2 kit today for better, stronger, and cleaner bass from your Stereo 120,SCA-80, SCA-80Q, or ST-80 with stock (original) Dynaco amplifier modules.
See also C7X2, above, for the original 3-capacitor version that supplies 9900 uF at 80 Volts, with a bit more wiring to do...
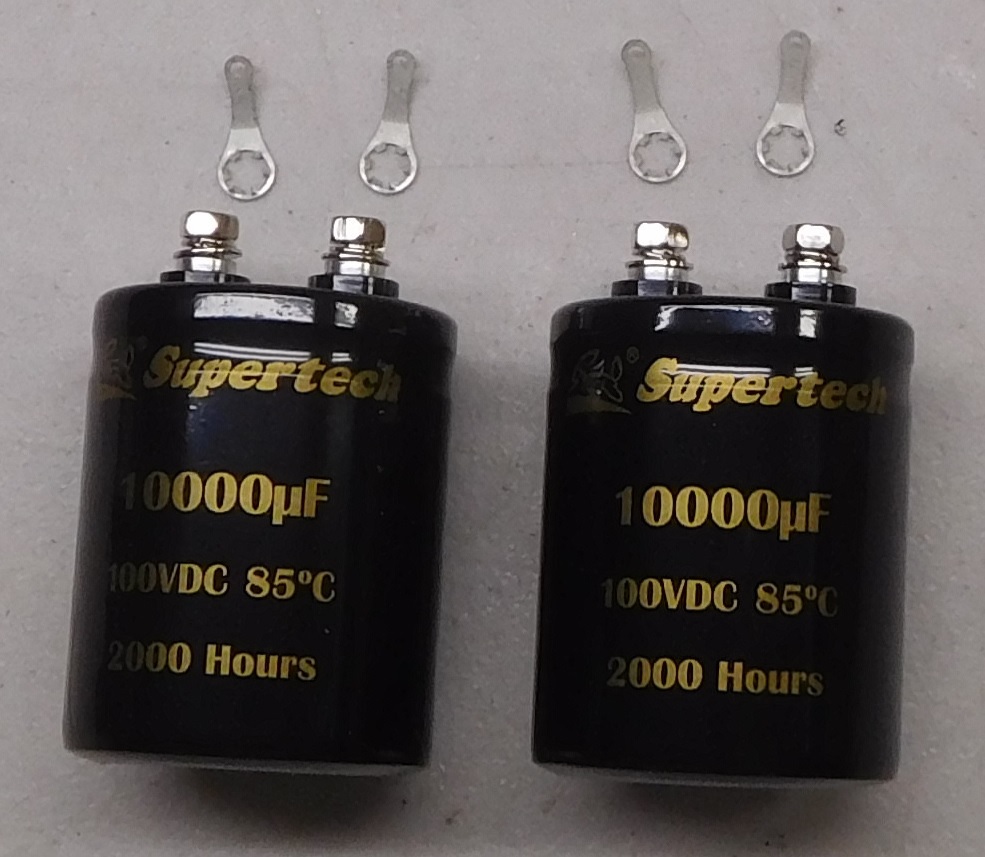
The original speaker coupling caps were a bit on the small side, at 3300 uF. This kit provides two 10,000 uF 100 Volts capacitors with a 2" diameter. They drop right in to the original clamps. You get 10,000 uF per channel, producing better bass, more bass power, and lower bass distortion. Because these caps should drop right in, we supply no additional hardware except for solder lugs for the heavy-duty screw terminals.
Order your C7X2C kit today for better, stronger, and cleaner bass from your Dynaco equipment. It's for use with:

The original power switches have classic orange neon-lamps. Swap them for beautiful blue using our step by step directions... Blue Light Assembly and Installation Manual. Not so many steps in this case, so you should be able to complete a Stereo 120 lamp swap in about 1 hour. This mini-kit gives you eight tiny blue LEDs preassembled onto a PCB about the size of an NE-2 lamp. You install the included dropping resistors and heat shrink tubing to complete assembly, then swap out the orange NE-2 for beautiful blue. You can put blue light anywhere an NE-2 lamp can fit.

Now you can make the front panel of your PAT-4 look as good (or even better) than the updated insides! We've got custom-made front panels available. Each one is shipped separately in its own shipping box to keep it looking good when we ship it to you. No more scratches, dents, or worn-away text. Just a beautiful brand new front panel. Shipping to the lower 48 states is $10, at it will be added at check-out. We also have brand new front panels for the PAS-3X.
Gold plated RCA jacks make quality connections.
The RCA jacks on a PAT-4 can get pretty oxidized and just plain crummy with time. That makes it hard to get a good low resistance connection, which can lead to lots of extra noise and distortion. You can replace all your RCA input and output jacks with this kit, get great connections, and great sound.
We've also added the "Great Ground" to the kit. The original ground was just a self-tapping sheet metal screw. Of course, you never have a screw driver handy when you're fiddling around with the connections. The great ground supplies a 6-32 thumb-screw arrangement so you can connect your grounds without any tools. (You will need to open up the ground hole a bit).
At just $21 plus shipping, the price is practically a give-away!
Note: It's easy to change the jacks if yours are held in by screws. If they're held in by rivets, think carefully before purchasing this kit. The rivets can be drilled out, but it's a lot more work!
The original PAT-4 power supply was another classic Dynaco compromise, perfectly appropriate for the time. Later, people took the "add a mess o'microfarads approach" to improve it. This new PAT4 replacement power supply beats all those approaches hands down. It is electronically regulated with super quiet 38 Volt and 17.5 Volt rails. The output voltages remain rock steady even as the line voltage wavers and the music plays. I think you'll hear a nice improvement in the sound of the PAT-4 using this power supply.
The picture shows the FR-4 (green) PC board, and the way the replacement power supply elegantly mounts in place of the old capacitor can. The new arrangement dramatically decreases the loop-area of the rectifier input, cutting stray hum fields. The kit comes with everything that you need...PC board, parts, mounting brackets and screws (but no solder).
This is an assembled and tested version of the PAT4PWR kit shown above. You still have to install it into your PAT-4, but buying in this form may be the right choice for some. We build and test each to order, so shipments happen about 1 week after your order is received.

PAT4RENEW assembled circuit board shown, but it comes as a kit of parts and unassembled PC boards
The old way to upgrade your PAT-4 was by purchasing these three kits (and a new power supply of course):
We still sell these kits, and you can take this path if you prefer. For example, if you don't bother with records, you could just order DDR4 and PAT4LSRC and save money.
The new way to upgrade your PAT-4 is the PAT4RENEW. It includes all the functionality of the above kits, but does it even better. The layout has a groundplane that helps reject noise. The design also has muting relays. They make the turn-on and turn-off transient free. If you want all this functionality, this is an easier, neater way to upgrade your PAT4. In addition, it has an improved phono section design that about doubles the maximum input signal acceptance, raising it to about 150 mV RMS at 1 kHz!
Of course, you'll still need to upgrade the power supply, and you can still (optionally) add the PAT4X transformer, tone control switch...and who knows what else I'm forgetting! By the way, there's an extra row of holes that makes it easier to install the tone control switch, and the anti-click resistors are already installed!
Here's a summary of the specs
You can download and take a look at the assembly manual here.
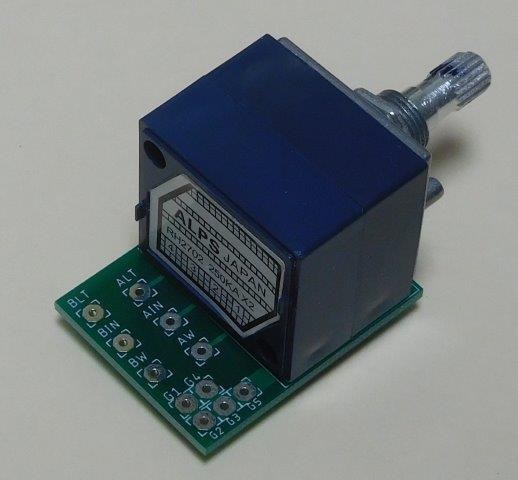
Volume control with custom PCB makes wiring easier.
This is a really nice replacement for the volume control in either a PAT-4 preamp or an SCA80. It's based around an ALPS stepped volume control with a loudness tap. We've added all the bits and pieces that make it a good fit for the PAT4 or SCA80.
The gain tracking between the left and right sections of the pot is amazingly good, basically better than 0.1 dB at every step above cut-off. The presence of the loudness tap maintains all the function of the original Dynaco pot. There is one difference compared to the original pots. With only 23 steps, each sized at around 3.4 dB, the gain steps are not as fine as those of the original pot, which essentially had an infinite number of gain steps. In practice, this hasn't been an issue, but it's good to understand the difference.
We have units in stock available for immediate shipment.
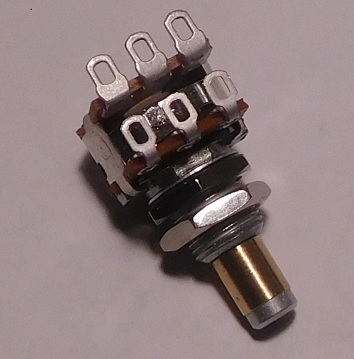
Balance Control drops into PAT4 and SCA80(Q)
This is a drop-in balance control replacement for the PAT-4 and SCA-80 balance pots. It comes with two nuts and a washer. The pot has a center detent for perfect balance. The shaft of the pot is 6.00 mm, so it comes with an adapter ring that builds out the shaft to 6.35 mm, or 0.25" diameter, just like the original. The shaft lenght matches the original, so the control will fit perfectly with the knob coming out to the perfect height.
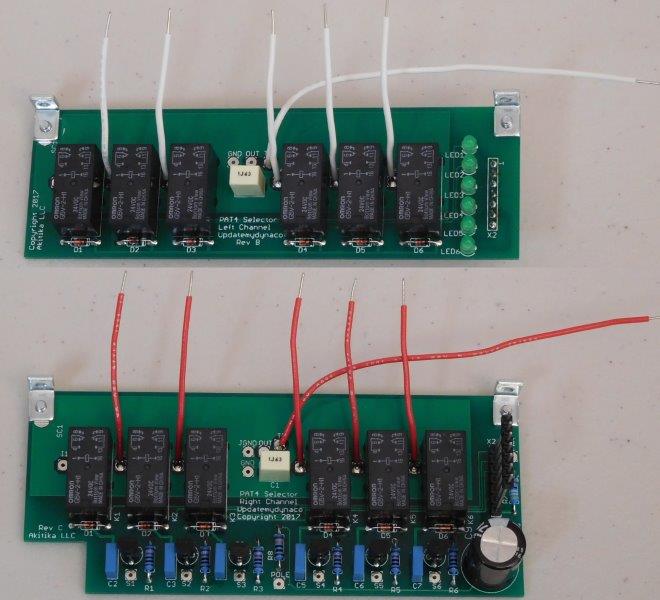
This selector upgrade kit replaces the original selector switch. It has a lot of advantages.
The new switch changes the operation from 3 low level inputs and 3 high level inputs to 1 low level input (phono) and 5 high level inputs.
The following upgrade kits must have been previously installed
You'll have to either:
Tone controls can be handy, but sometimes it's great to know what things sound like when they're absolutely out of the circuit. This kit replaces the seldom-used HI FILTER switch with a two position switch. The OFF position turns OFF the tone controls, no matter how they are set, giving flat response. The "15" position restores normal tone control operation. You can easily switch between the two positions. Our careful design makes the switch-over completely free of clicks and pops. So now you can have it both ways...be a purist with absolutely flat response, or use the tone controls when your source material needs a hand.
The kit now includes replacements for the two capacitors most likely to have gone leaky. You'll want to install these caps if your bass control is scratchy. That often will take care of the problem, at least in all those cases where bass control is still in reasonable shape.
Tone Control Switch Assembly Manual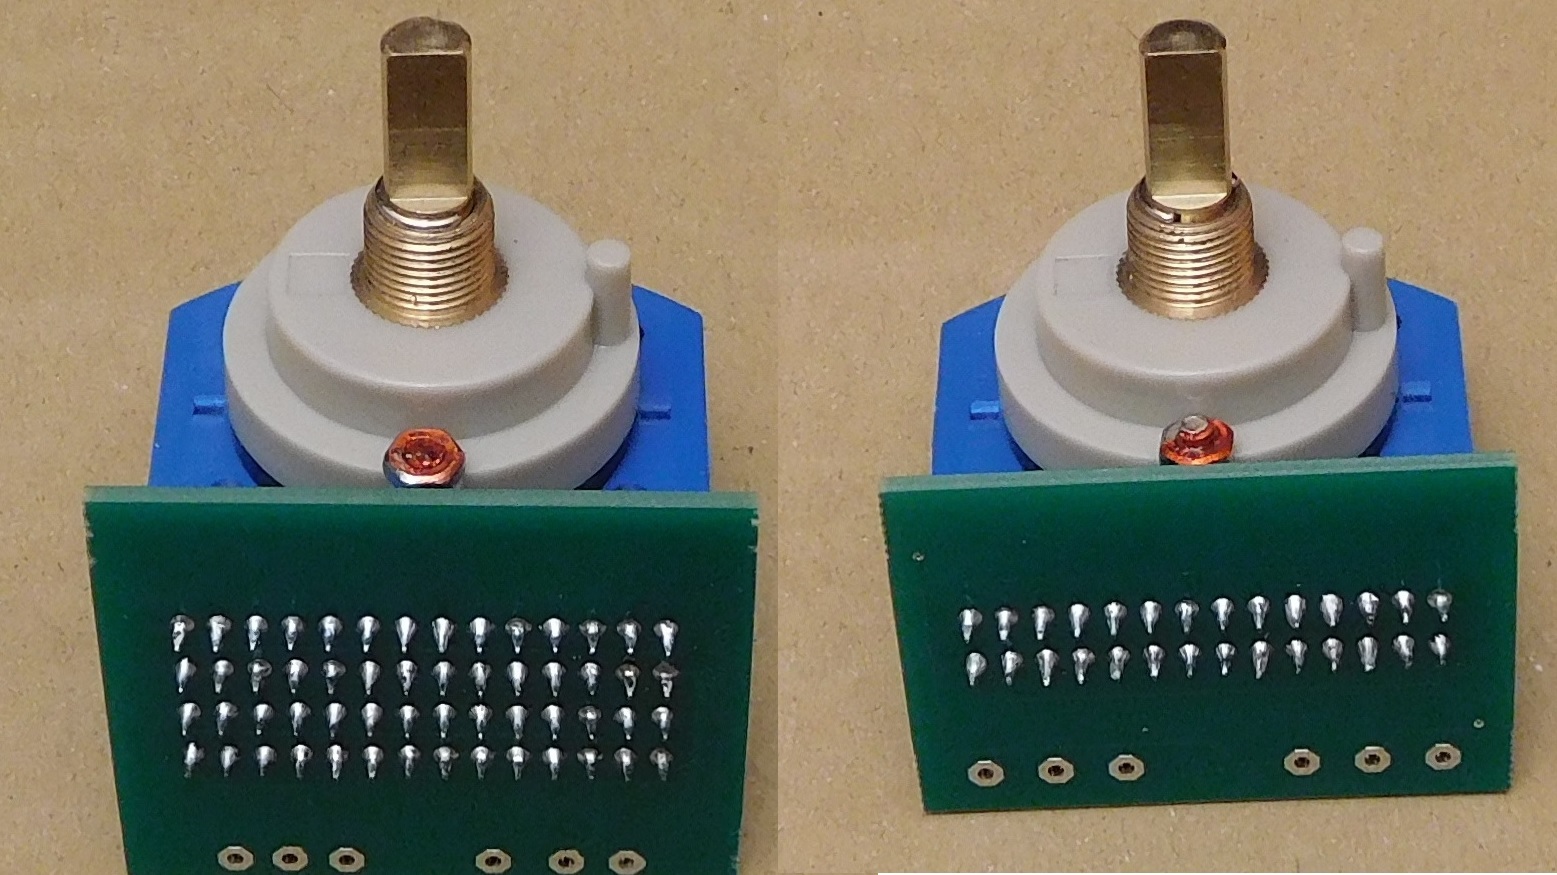
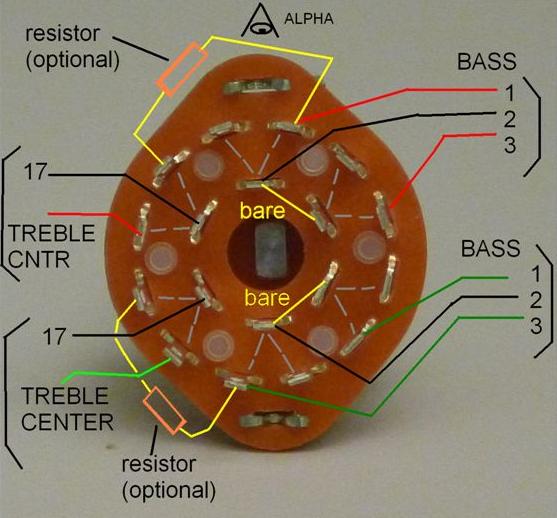
The original Dynaco tone controls for the PAT-4 had their pluses and minuses. If you adjusted them carefully, they were out of the circuit. Getting that adjustment was difficult. Further, getting repeatable settings of bass and treble was difficult. And, if the controls failed, you were pretty well out of luck. The only answer was scavenging from a "for parts" PAT-4.
We've changed all that with the PAT4STC kit. STC, pronounced "Estacy", stands for Stepped Tone Controls. These are a pair of 11-position switches, one for bass, and one for treble. 5 steps of cut, 5 steps of boost, and 1 step in the middle that is dead flat.
The bass control is calibrated to give -10, -8, -6, -4, -2, 0, +2, +4, +6, +8, or +10 dB at 100 Hz wrt 1 kHz.
The treble control is calibrated to give -10, -8, -6, -4, -2, 0, +2, +4, +6, +8, or +10 dB at 10 kHz wrt 1 kHz.
We had special switches developed to implement the bass control law and the treble control law. We had special resistor arrays made on pre-assembled surface mount PCB's. This saves the space we need to fit these accurate controls into the PAT-4 physical design.
The new controls keep left and right tone controls in perfect tandem. This requires new knobs for bass and treble, and these knobs are included. They are very close to the original Dynaco style. The slight difference reasonably marks these as bass and treble controls that fit harmoniously into the existing front panel design.
The only bad thing? This product makes the tone control switch kit (TCS) obsolete!
Toroidal Transformer replaces original E-I transformer and cuts hum!
If you already have the PAT4PWR installed, this kit is the next (and perhaps final) big step in making hum as low as it can go. More information on the PAT4X kit. This is a special order item, but we have kits in stock now for immediate delivery. .
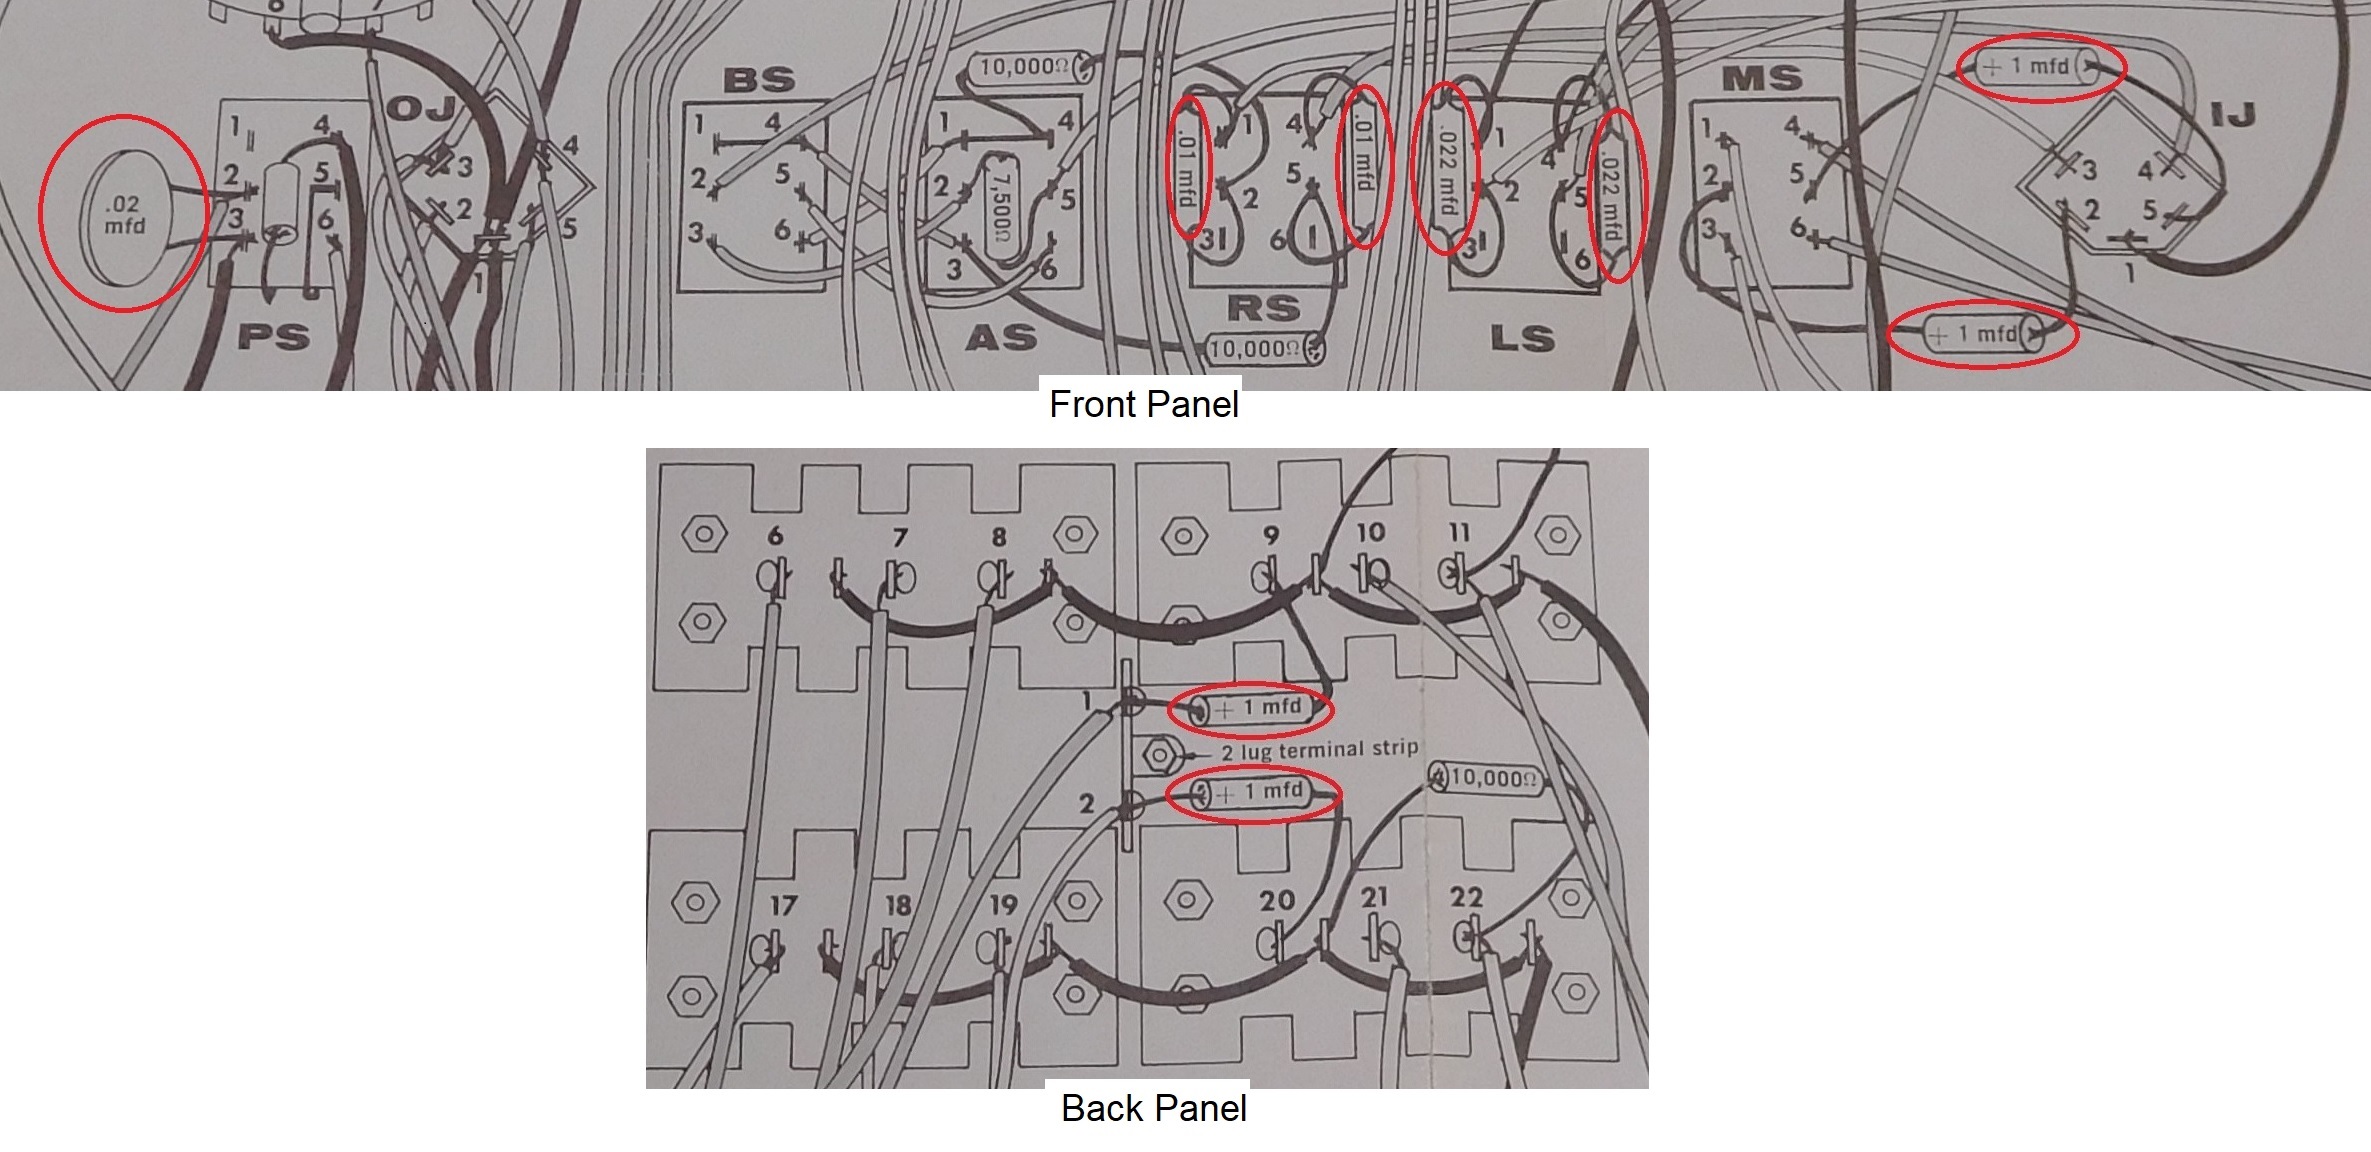
These 9 caps are installed on the chassis of the PAT-4, rather than on the PCB's. Typically, they're left unchanged, but some of you doing complete upgrades have asked why! OK, typically they make the journey through time, but while the lid is off, why not make it all better? We replace:
Take a look at the manual to see the steps involved in updating these caps.
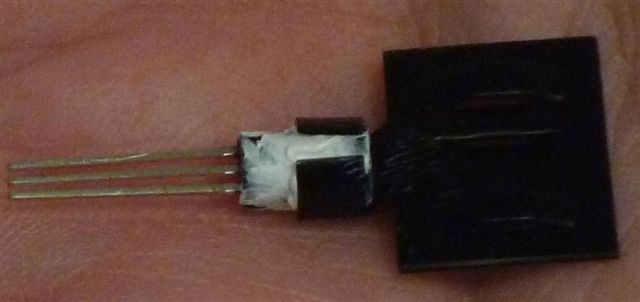
All the sound in the PAT-4 passes through the high level stage. This kit reduces the distortion in the high level stage by a factor of 10X. You'll replace Q4 in both channels by a specially selected Darlington transistor with a heat sink. Everything that goes through your PAT-4 will be cleaner. The kit includes two new transistors, one for each channel.
This $7 kit has been called "the best value in audio". Hear the difference it will make in your PAT-4 Preamp!
This kit turns the PAT-4 Phono Preamp into a seriously good piece of gear. It drops the noise by 4 to 8 dB.
It makes topology and parts changes that let you get rid of the big electrolytic caps, dramatically improving the sound.
It's customizable...you can select optimal gain when you install the upgrade. It lets the PAT-4 handle three
phonos. It removes the clunks that always accompanied the switch from high level to low level sources. This is
a challenging kit, but you'll love the results. The picture shows the PAT-4 PCB board after the mods of the PAT4LP kit.
Notes:
Please note-this kit has one downside...it reduces the rushing component of the PAT-4's noise so much that it unmasks the unavoidable hum floor of the PAT-4 phono preamp. That hum floor is not noticeable when playing a record, but depending on your system, you may notice it with the needle up.
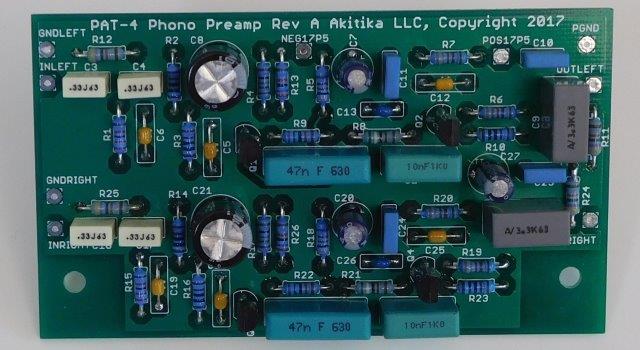
This kit costs more than the PAT4LP listed above, but then you get more. This is a complete, new PCB and components kit that replaces the phono section of the original PCBs. There are a lot of nice advantages to doing it this way:
Please note: This kit requires that you have installed the PAT4PWR improved power supply!
You can replace the phono preamp in your PAT-5 when you combine the PAT4PPR with this kit. The combination adds a great sounding, quiet, accurate preamp to your PAT-5. Unlike the other Updatemydynaco kits, it doesn't have all the mechanical bits worked out in its current form. I haven't yet written a detailed installation manual for this combination. Still, that hasn't stopped a number of people from adding these kits to their PAT-5, with great results.
The picture above shows one PAT-4 PCB modified with Line Stage Replacement Components, and the DRD4 kit (not included)
This kit supplies replacement resistors, electrolytic capacitors, and input transistors (Q3) for the PAT-4 preamp line stage. The kit consists of enough components to do both the left and right channels. The original resistors had 5% and 10% tolerance. The resistors in the kit have 1% tolerance. The original resistors were carbon composition. The new resistors are metal film. Metal film resistors are both quieter and have less distortion.
To minimize your overall work while maximizing your overall performance, you might want to also purchase and install these kits at the same time:
Note that the kit doesn't replace the polyester capacitors as these have an almost indefinite life.

The picture shows 4 convenience outlets, 2 in black, and 2 in deep brown (burgundy). These were removed from a PAT-4. The price shown is for a single convenience outlet.
I have yet to find a new source for these outlets, so parted-out PAT-4's are essentially the only way to get replacements. I don't have a lot, so either email me before ordering. Alternatively, if you order without knowing stock, I might have to refund your order. The plastic part of the outlets that I have is perfect. This is a bit unusual as the majority of preamps will have broken pieces of the plastic part of the outlet. Please note that mounting screws, nuts, and lockwashers are not included.
I have other parts from parted-out PAT4's. Drop me a line at dan@updatemydynaco.com to see if I have what you need.

The original power switches have classic orange neon-lamps. Swap them for beautiful blue using our step by step directions... Blue Light Assembly and Installation Manual. Not so many steps in this case, so you should be able to complete a Stereo 120 lamp swap in about 1 hour. This mini-kit gives you eight tiny blue LEDs preassembled onto a PCB about the size of an NE-2 lamp. You install the included dropping resistors and heat shrink tubing to complete assembly, then swap out the orange NE-2 for beautiful blue. You can put blue light anywhere an NE-2 lamp can fit.
IN STOCK!
You can upgrade the power supply and power amp PCB's of your SCA80(Q) integrated amp or Stereo 80 Power Amp with this kit. It supplies:
The kit features low distortion and clean sound, much cleaner than the original SCA80/Stereo 80 power amp section. It also has timing circuits and speaker relays for completely civilized turn-on and turn-off. You'll enjoy building this kit, and you'll enjoy listening to the results for a long time.
Note: This kit re-uses the existing C9, C11, and C7. You can buy upgrade kits for C9, C11, and C7 separately. It does not include the SCA-80 or Stereo 80.
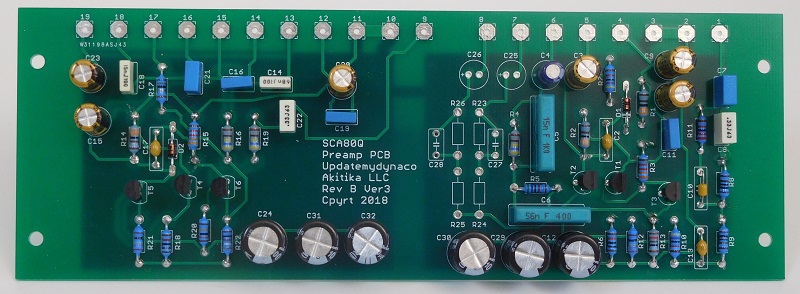
This kit is easy to build. It gives you everything you need to replace both left and right channel preamp PCB's in an SCA80(Q). It's much easier than the SCA80PREDO kit, since you get brand new PCB's to populate. And these new PCB's are nice! They have ground planes to reduce noise susceptibility. The have local bypass capacitors for improved stability and noise rejection (the original Dynaco PCB's had no local bypass caps).
That's not all...It has a darlington plus boot-strap topology that makes the equalization more accurate in the phono, and reduces distortion in the line stage and the phono. At typical operating levels, the preamp distortion is more than 100 dB down. That's better than 10 ppm, or 0.001%. It has 1% resistors and 1% capacitors in the phono eq. The phono equalization curves are very accurate, typically better than +/-0.25 dB. These boards are quiet and clean, and will make the preamp section of your SCA80(Q) better than new.
Each kit contains 2 PCB's and all the components you need to replace both left and right channel PCB's for the preamp section. We even throw in a set of wire labels and keps nuts to make reassembly easy.
SCA80(Q) owners, this is the project you've been waiting for!
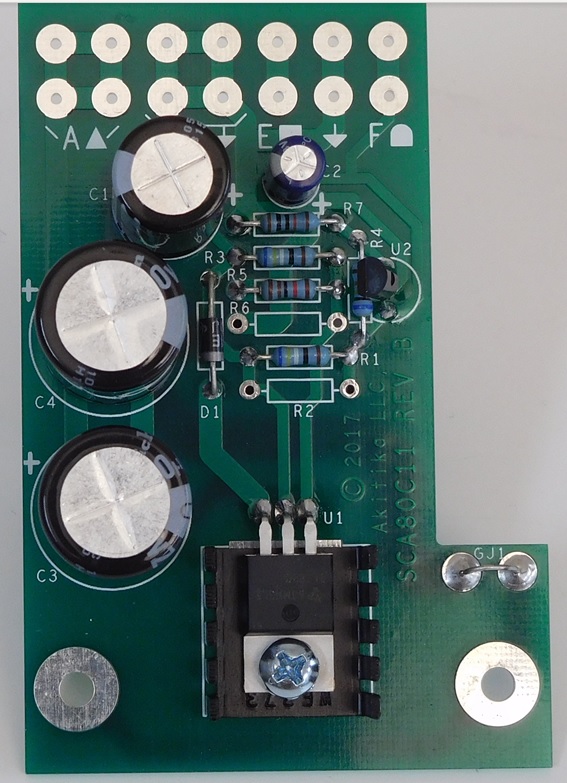
C11 was the silver-can 3-section filter capacitor that supplied power to:
If you've replaced C9 and still have hum it's a very sure bet that your C11 is on its last legs. These kinds of caps aren't available anymore, so we're going to go one better. The original kit used 3 caps and two resistors to make the 24 and 17.5 volt supplies. Simple, yes, but we can do a lot better with an update.
The SCA80C11 kit supplies the bulk capacitance required by the amplifier driver sections. To that it adds the finesse and control of two electronic regulators. One makes the 24 volts for the high level preamp stages and the other further filters that already clean power to make 17.5 volts for the phono preamp. The electronic regulation decreases noise, crosstalk, and output impedance of the power supplies. It also steadies the supply voltages no matter what's happening to the line voltage or the load on the power amps. The SCA80C11 kit's circuit board drops right in, replacing the original C11 with something that will truly upgrade your SCA80's sound.
See Also SCA80C9C, below, for a somewhat easier to install version that uses a single 10,000 uF 100V 2" diameter capacitor
The SCA-80 and ST-80 have the same power amplifier section design. Not surprisingly, C9 is the main filter cap in both the SCA80(Q) and ST-80 power supplies. If your SCA80 or ST-80 is humming more than it used to, then it's very likely that the original C9 has lost a lot of its capacitance. This seems to be a very common problem with SCA80's, and a little less so with ST-80's. The SCA80C9 kit replaces the original 5000 uF 80 Volt capacitor with three 3300 uF 80 Volt caps in a dynamite capacitor configuration. It bumps the power supply capacitance up from 5000 uF to 9900 uF. You'll get lower noise and better bass.
This is a single 10,000 uF 100V cap with 2" diameter that drops in to upgrade the original C9. Compared to SCA80C9 (above), it has simpler wiring and installation.
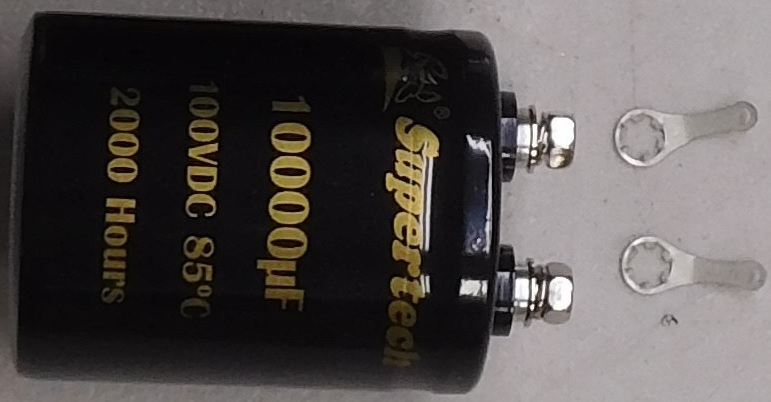
This is an alternative to the original SCA80C9. It is functionally similar. The main difference is that 10,000 uF @100V is supplied in a single 2" diameter cap. The SCA80C9 uses a triple of capacitors and some additional wiring. As a result, this kit is somewhat easier to install than the SCA80C9. You might even like the look of the single big capacitor compared to the triple. In terms of the results, the SCA080C9 and the SCA80C9C are very similar.
See also C7X2C, below, for a brand new version that supplies 2" diameter, 10,000 uF at 100 Volt caps that are a drop-in replacement, with simpler wiring

The original speaker coupling caps were a bit on the small side, at 3300 uF. This kit provides 6 3300 uF capacitors that you arrange in a Dynaco Dynamite Capacitor triple. This yields 9900 uF per channel, producing better bass, more bass power, and lower bass distortion. As always, you get a step-by-step manual that guides you through the upgrade process. You recycle the capacitor clamps, some wire and some screws. We've included special hardware in the kit to make the most cumbersome part of the job go more smoothly. This kit works for both the ST-80, SCA-80, SCA-80Q, and the Stereo 120. Take a look at the C7 Upgrade Assembly Manual. It's about a 7 Meg download owing to some hi-res pictures that we think will make the upgrade enjoyable.
Order your C7X2 kit today for better, stronger, and cleaner bass from your Stereo 120,SCA-80, SCA-80Q, or ST-80 with stock (original) Dynaco amplifier modules.
See also C7X2, above, for the original 3-capacitor version that supplies 9900 uF at 80 Volts, with a bit more wiring to do...

The original speaker coupling caps were a bit on the small side, at 3300 uF. This kit provides two 10,000 uF 100 Volts capacitors with a 2" diameter. They drop right in to the original clamps. You get 10,000 uF per channel, producing better bass, more bass power, and lower bass distortion. Because these caps should drop right in, we supply no additional hardware except for solder lugs for the heavy-duty screw terminals.
Order your C7X2C kit today for better, stronger, and cleaner bass from your Dynaco equipment. It's for use with:
Gold plated RCA jacks make quality connections.
This kit is for the SCA-80 or SCA80(Q). The picture above shows a half converted unit. The jacks on the top are new gold-plated RCA's. The jacks on the bottom are the original, oxidized RCA jacks. That oxidation makes it hard to get a good low resistance connection, which can lead to lots of extra noise and distortion. You can replace all your RCA input and output jacks with this kit, get great connections, and great sound.
At just $12 plus shipping, the price is practically a give-away!
Note: It's easy to change the jacks if yours are held in by screws. If they're held in by rivets, think carefully before purchasing this kit. The rivets can be drilled out, but it's a lot more work!
This kit can also be used to replace the RCA jacks in the SE10 Equalizer.
The Stereo 80 has screw terminals for speaker connections. They're a bit hard to deal with. Here's a neat kit with two pairs of 5-way binding posts and lugs. They fit beautifully, although there is a gap in the center...but that gap gives you room to tighten both black binding posts. No manual available on this one yet...I figure it should be pretty apparent from the pictures above. Just $10.00 gets you easy on/off speaker connections on your Stereo 80.
The cut-out in the Stereo 80 is 0.5"x2.75". The slot in the SCA80(Q) is exactly the same size. Therefore, you can also use the ST80BP kit in the SCA80(Q), and it will look very much like the picture shown above. Note: Since the SCA80(Q) has two sets of speaker outputs, you'll have to order two ST80BP kits to replace the speaker connectors in an SCA80(Q).
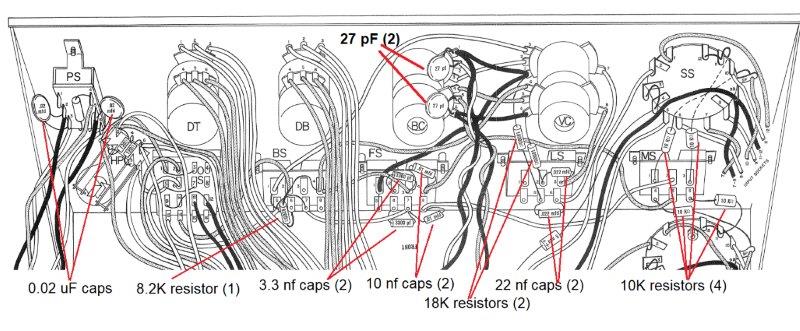
The resistors and caps on the front panel tend to live a long time, and typically don't need to be replaced. However, if you're redoing your SCA80(Q), and it's open anyway, why not freshen up the front panel R's and C's? We supply replacements for the R's and C's shown in the picture above.

The SCA80(Q) preamp boards were built with 10% carbon comp resistors. They drift in value and get noisy, hurting your SCA80's performance. You can restore it to better than new condition with this complete kit of parts. Quiet 1% metal-film resistors replace the original noisy drifty resistors. All the electrolytic capacitors are replaced. All the film caps are replaced with new film or COG capacitors. The old transistors are all replaced with some beautiful MPSA18 transistors. These transistors have lots of gain and low noise and are no longer available, except here in this kit. Your SCA80 isn't really re-built until the preamp section is re-built. We recommend having serious desoldering equipment before you undertake this kit.
The Stereo 80 has screw terminals for speaker connections. They're a bit hard to deal with. Here's a neat kit with two pairs of 5-way binding posts and lugs. They fit beautifully, although there is a gap in the center...but that gap gives you room to tighten both black binding posts. No manual available on this one yet...I figure it should be pretty apparent from the pictures above. Just $10.00 gets you easy on/off speaker connections on your Stereo 80.
The cut-out in the Stereo 80 is 0.5"x2.75". The slot in the SCA80(Q) is exactly the same size. Therefore, you can also use the ST80BP kit in the SCA80(Q), and it will look very much like the picture shown above. Note: Since the SCA80(Q) has two sets of speaker outputs, you'll have to order two ST80BP kits to replace the speaker connectors in an SCA80(Q).

The original power switches have classic orange neon-lamps. Swap them for beautiful blue using our step by step directions... Blue Light Assembly and Installation Manual. Not so many steps in this case, so you should be able to complete a Stereo 120 lamp swap in about 1 hour. This mini-kit gives you eight tiny blue LEDs preassembled onto a PCB about the size of an NE-2 lamp. You install the included dropping resistors and heat shrink tubing to complete assembly, then swap out the orange NE-2 for beautiful blue. You can put blue light anywhere an NE-2 lamp can fit.
See also the next product, ST80CAPSC, that does the same thing in a little easier to build form
The most usual failure mode in the stereo 80 is that the big can capacitors lose capacitance. This kit bundles the following items:
It performs the same function as the ST80CAPS kit, but is a little easier and cleaner to assemble.
The Stereo 80 has screw terminals for speaker connections. They're a bit hard to deal with. Here's a neat kit with two pairs of 5-way binding posts and lugs. They fit beautifully, although there is a gap in the center...but that gap gives you room to tighten both black binding posts. No manual available on this one yet...I figure it should be pretty apparent from the pictures above. Just $10.00 gets you easy on/off speaker connections on your Stereo 80.
The cut-out in the Stereo 80 is 0.5"x2.75". The slot in the SCA80(Q) is exactly the same size. Therefore, you can also use the ST80BP kit in the SCA80(Q), and it will look very much like the picture shown above. Note: Since the SCA80(Q) has two sets of speaker outputs, you'll have to order two ST80BP kits to replace the speaker connectors in an SCA80(Q).

The original power switches have classic orange neon-lamps. Swap them for beautiful blue using our step by step directions... Blue Light Assembly and Installation Manual. Not so many steps in this case, so you should be able to complete a Stereo 120 lamp swap in about 1 hour. This mini-kit gives you eight tiny blue LEDs preassembled onto a PCB about the size of an NE-2 lamp. You install the included dropping resistors and heat shrink tubing to complete assembly, then swap out the orange NE-2 for beautiful blue. You can put blue light anywhere an NE-2 lamp can fit.
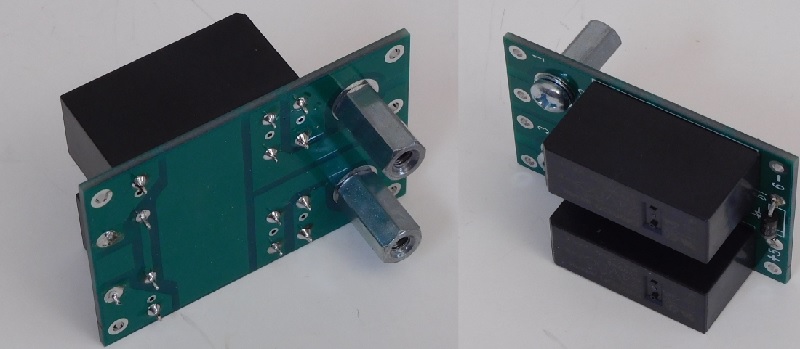
You can now get a replacement speaker relay kit for the Stereo 400, 410, or 416. It uses a pair of sealed relays with contacts rated at 16 Amps. This exceeds the original relay's current carrying capacity. We've named this the RY301 kit after its designation in Stereo 400 schematics. Here's the Stereo 400 Relay Kit Manual.
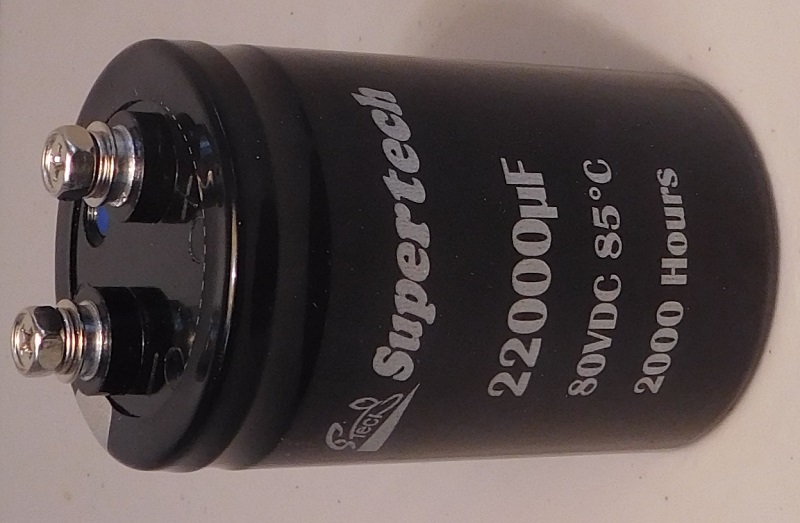
The original power supply capacitors in the Stereo 400, 410, and 416 were 10,000 uF at 75 Volts. You can double the energy storage and improve the low frequency output power when you change to these 22,000 uF 80 Volt capacitors. Their 2" diameter makes them drop right in. The screws have the right diameter and spacing, too. There's an enhanced version of this kit that's just perfect for Stereo 150's. These amps all use two capacitors, one for each polarity of power supply. These caps will drop into and upgrade a lot of big amplifiers...DH200's, DH220's...the list goes on and on! Here's a copy of the data-sheet.
Please note, that even though these capacitors have 2.2 times as much capacitance and a higher voltage rating than the originals, they are not as tall as the originals. Why? In the 40 years or so since the original caps were made, the electrolytic capacitor technology has advanced to where much more capacitance fits in much less space than it used to. I have found that shorter isn't a problem...it just typically fits into the amps with more headroom.
A comment about "2000 hours" on the capacitors. That refers to the life of the cap when operating at 85C, the rated ripple current, and supply voltage. In amplifier service, the ambient temperature is typically closer to 25C, and there is very much less ripple current than 8.5 Amps! As a result, it's reasonable to estimate that the core temperature (which depends on both ambient and ripple current) will be at least 60 C cooler. That says that the estimated life is then 2^(60/10)=64 times longer, or something more than 14.6 years of continuous duty use. If you turn your amp off, it's hard to say how much longer these caps would last...perhaps another 40+ years?
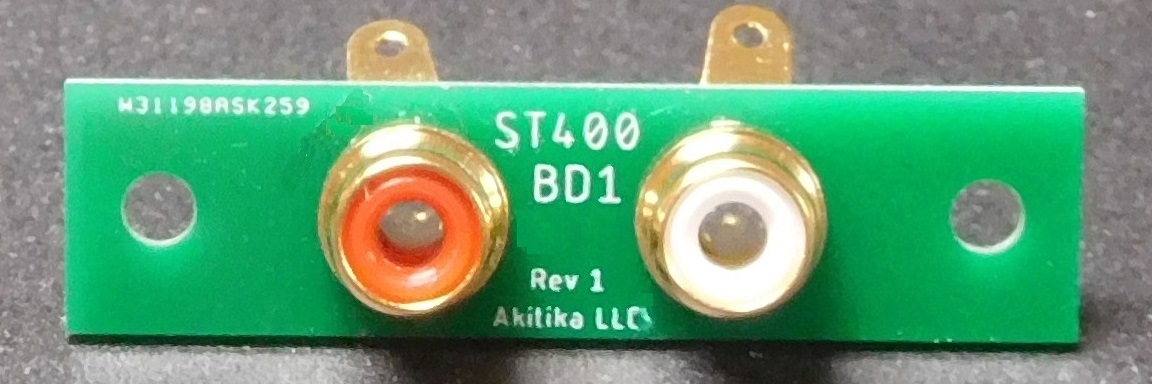
A low resistance ground connection is important for best performance. Your forty+ year old RCA input jacks may have oxidized significantly, limiting the potential of your amp. We've made a Gold Plated RCA Jack replacement/upgrade for the Stereo 400, 410, and 416. The original jacks limited your choice of RCA cables as the ends of those jacks didn't quite reach the outer surface of the heatsink. The end of the new jacks moves 1/8" in the correct direction, outward, which may allow for a wider range of RCA cables.
The kit includes everything you see plus keps nuts and sems screws to mount the new kit. These assure a firm grip to maintain precise registration of the jacks within the heatsink.
Please note that wrestling with a Stereo 400 is not for the faint of heart. We have a great manual that makes it easier to do, but it still requires some skill to succesfully make this replacement.
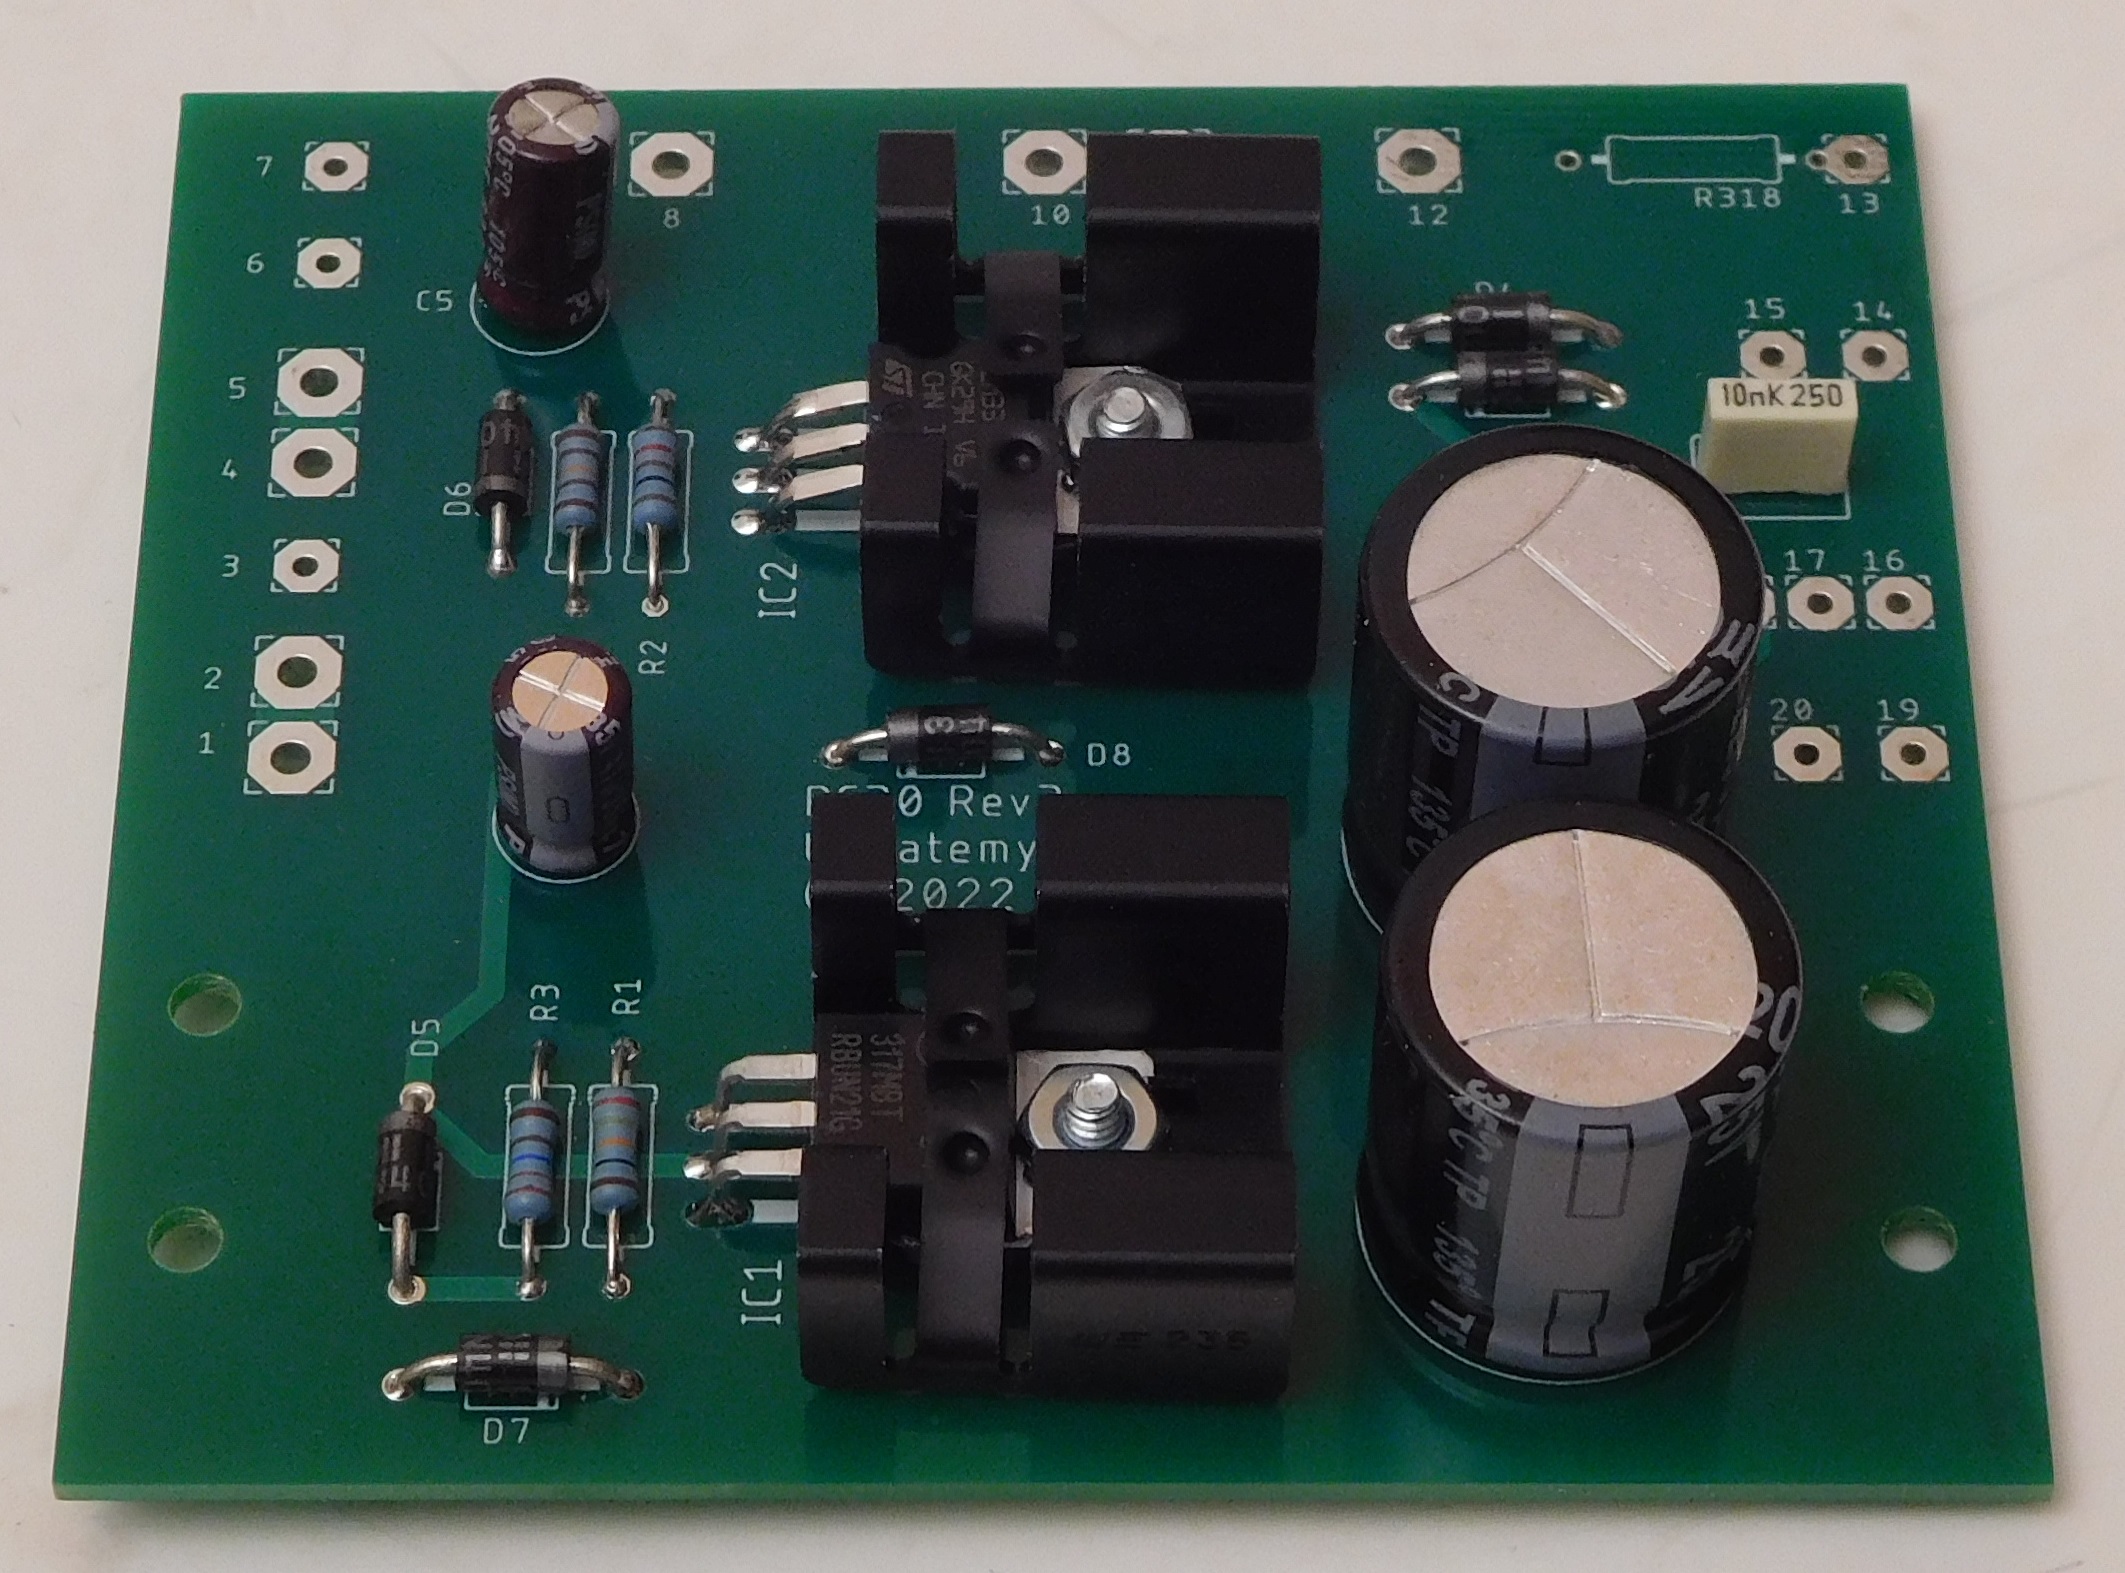
The PC-30 is a power supply for all the low-level sections of the Stereo 400. For some reason, the original implementation was kind of old fashioned, made with large power resistors run from the +/-75 volt rails with Zener diodes to regulate the +/-13V supply. Between those two resistors, the dissipation is a total of 11 Watts! That was enough to put burned spots on the PCBs. At most, the useful available power from this configuration is 1.75 Watts.
Now, someone on the design team was a bit forward looking, because the Stereo 400 also included low voltage windings on the transformer. They went essentially unused in the original design. In our new PC-30 design, we take advantage of the low voltage windings to produce pristine plus and minus 13 volts, while wasting perhaps 1 or 2 Watts, not 11 Watts! Keeping 10 Watts of constant heat out of the Stereo 400 is actually a very nice thing to do.
If you’d like your Stereo 400 to live long and prosper, we recommend installing our PC-30 board when you upgrade your Stereo 400.
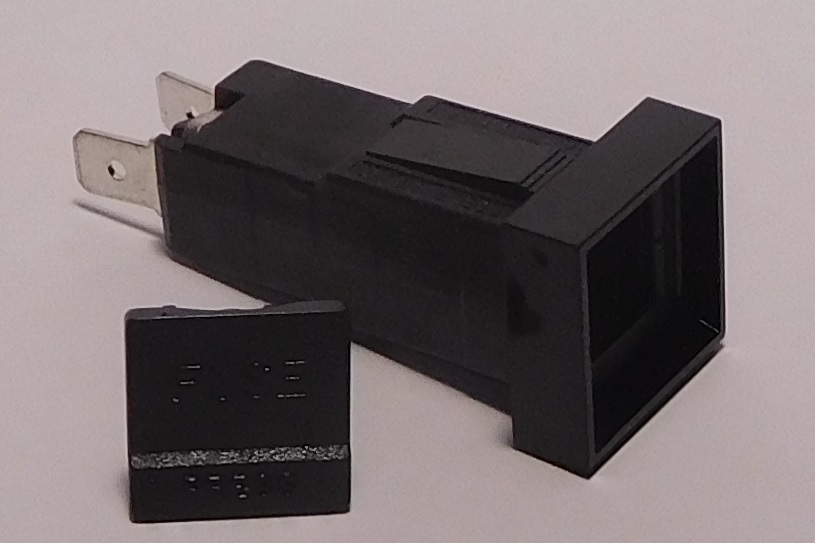
Part of the safety system for speakers connected to a Stereo 400/410/416 consists of speaker fuses. The holders sometimes wear out or break. You can replace the old fuse holders with these. The indicated $10 price covers one of the fuse holders. You'll need to order two of the fuse holders (total of $20.00) if both of your fuse holders need replacement.
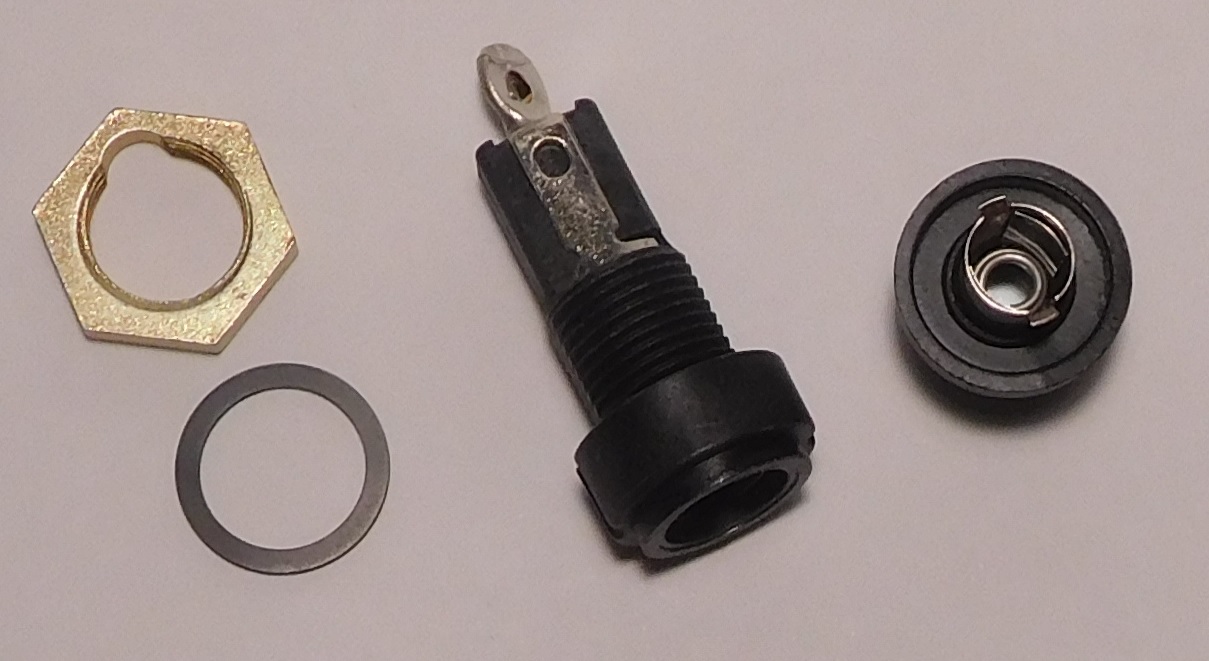
Classic audio equipment has fuse holders that accommodate 3AG fuses. Evenutually the original holders fracture. These fuse holders mount in a 0.5" hole, with two flats about 0.440" apart. The cap holds a fuse that pushes and twists into place.
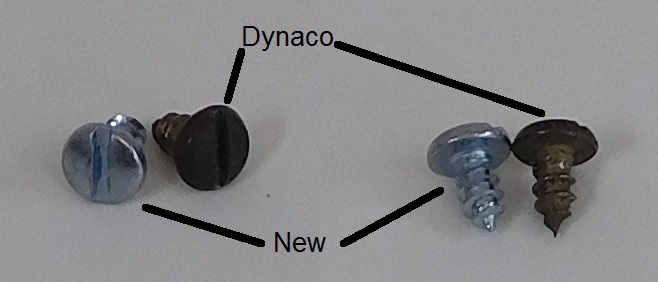
It seems like everyone has a Dynaco that's missing a screw! Here's a set of 5 screws, enough to replace all the original sheet metal screws that hold the cover on a typical Dynaco. The picture compares an original screw which the new screw. Note that the new screws have a brighter finish than the typical stock screws.

David Hafler was one of Dynaco's guiding lights. Eventually, he left Dynaco and started David Hafler audio. His first product with the DH-101 preamp. Another paragon of value, it featured inexpensive RCA jacks that eventually turn to crud. You can upgrade your RCA jacks, replacing the oxidized jacks with new, gold plated RCA jacks. The kit includes new phono grounding and loading caps and cable ties. These things make the installation much easier. The result you get is better sound and less hum because you have low resistance, solid connections for all of your I/O.
You can take a look at the manual here
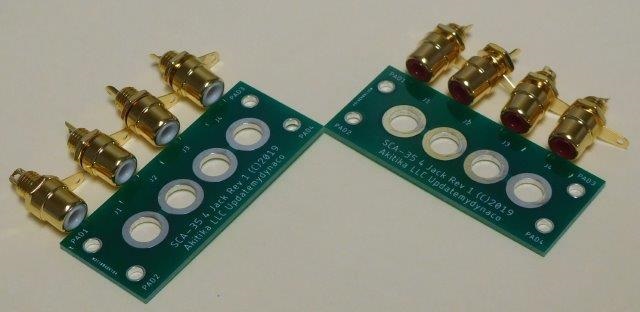
A lot of vintage equipment used RCA jack fields in a 4-jack configuration. We designed this kit originally for Dynaco’s SCA-35 tube integrated amplifier. Eventually we found lots more applications, like…vintage gear from Fisher and Harmon Kardon. Each kit contains a pair of the 4-jack assemblies, hence the name RCA4X2. One set of four has red insulators for the right channel. The other set of four has white insulators for the left channel. Like all our RCA jack assemblies, we supply gold-plated RCA jacks.
For the SCA-35, you’ll need to buy two of these kits to replace all of the jacks. For other vintage equipment, you’ll have to determine how many jacks and kits you need.
Tech Notes
You can take a look at the manual here. It has a few hints about assembling the jack kit.
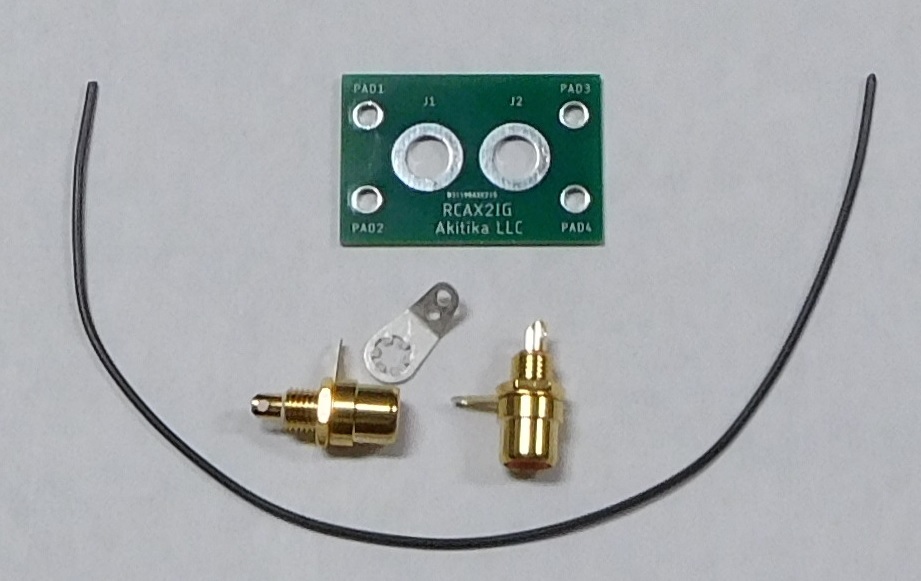
This kit is for vintage equipment that uses a 2 jack RCA jack field.
The gold plated jacks make for low resistance signal and ground connections, which minimizes noise and hum, and maximizes signal. Each kit comes with a #6 toothed lug and some 22 AWG black wire so you can customize the grounding setup to best fit your application.
Tech Notes
You can take a look at the manual here. It has a few hints about assembling the jack kit.

Now you can make the front panel of your PAS-3X look as good as the electronics sound! We've got custom-made front panels available. Each one is shipped separately in its own shipping box to keep it looking good when we ship it to you. No more scratches, dents, or worn-away text. Just a beautiful brand new front panel. Shipping to the lower 48 states is $10, and it will be added at check-out. We also have brand new front panels for the PAT-4.
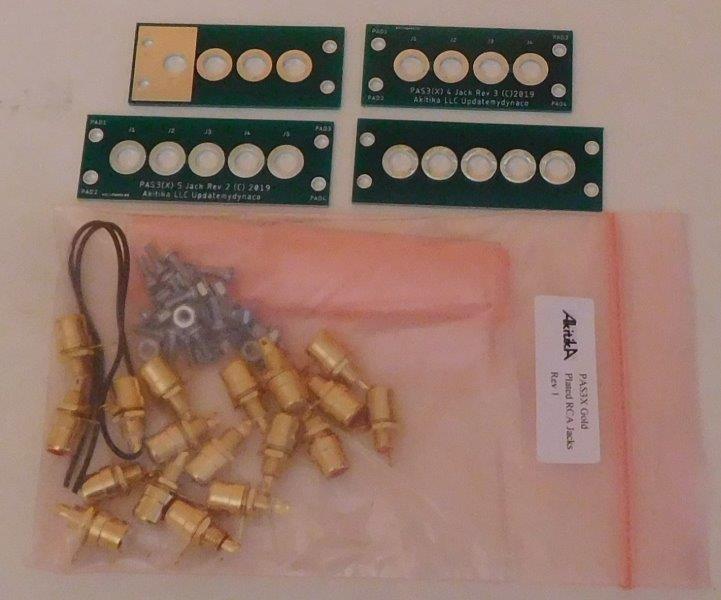
This kit is for Dynaco's PAS-3X (and PAS-3) tube preamp. There is no manual available for this kit, for now we'll have to assume you have a bit of expertise. Until now, I've only been selling this kit to professional upgraders who "say the secret word". Each kit includes:
The gold plated jacks make for low resistance signal and ground connections, which minimizes noise and hum, and maximizes signal.

The original power supply capacitors in the Stereo 400, 410, and 416 were 10,000 uF at 75 Volts. You can double the energy storage and improve the low frequency output power when you change to these 22,000 uF 80 Volt capacitors. Their 2" diameter makes them drop right in. The screws have the right diameter and spacing, too. They'll also drop right in to a Stereo 150, but there is another kit on this page that is even better suited to the Stereo 150. These amps all use two capacitors, one for each polarity of power supply. These caps will drop into and upgrade a lot of big amplifiers...DH200's, DH220's...the list goes on and on! Here's a copy of the data-sheet.
Please note, that even though these capacitors have 2.2 times as much capacitance and a higher voltage rating than the originals, they are not as tall as the originals. Why? In the 40 years or so since the original caps were made, the electrolytic capacitor technology has advanced to where much more capacitance fits in much less space than it used to. I have found that shorter isn't a problem...it just typically fits into the amps with more headroom.
These caps make a straightforward drop in upgrade for David Hafler's DH200 Stereo power amplifier. At 22,000 uF, they have 2.2 times as much capacitance as the original 10,000 uF caps but they fit in the same clamps. Their voltage rating, at 80 Volts, is a bit higher than the original caps (75 volts). The Hafler takes the upgrade in stride as it uses a bridge rectifier module bolted to the chassis.
A comment about "2000 hours" on the capacitors. That refers to the life of the cap when operating at 85C, the rated ripple current, and supply voltage. In amplifier service, the ambient temperature is typically closer to 25C, and there is very much less ripple current than 8.5 Amps! As a result, it's reasonable to estimate that the core temperature (which depends on both ambient and ripple current) will be at least 60 C cooler. That says that the estimated life is then 2^(60/10)=64 times longer, or something more than 14.6 years of continuous duty use. If you turn your amp off, it's hard to say how much longer these caps would last...perhaps another 40+ years?

You've got a big vintage amp, with rails of 80 volts or more, and its capacitors are getting kind of beat. This is your answer. In a 2" diameter package that's compatible with many classic vintage amplifiers, we have a 10,0000 uF 100V capacitor at a really reasonable price. Progress in capacitor technology means that the height of these caps, at 3", may be shorter than the old caps...so check to make sure that the new height will be compatible.
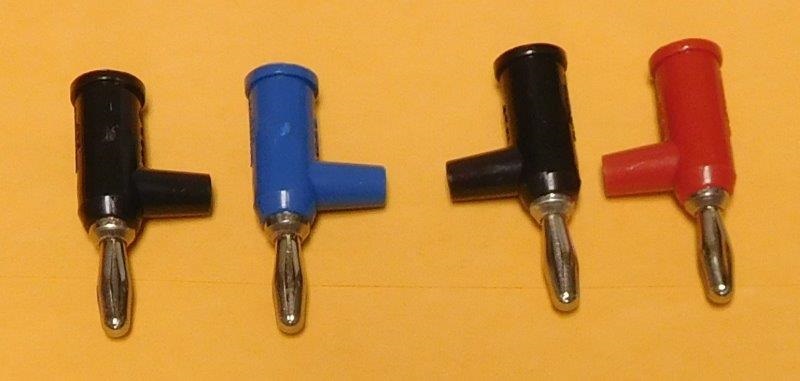
These banana jacks allow you to attach up to 12 AWG wire to the speaker binding posts of the Dynaco Stereo 120, Akitika GT-101 or GT-102, or any amp where you've installed the ST80BP upgrade kit. We provide 4 banana jacks, and they're color coded. This makes it easy to get your speaker phasing correct, which helps bass, and avoids left-right confusion, which can help imaging. With broad mating surfaces, and quick, secure connections, you can easily swap amps and speakers. Because these banana jacks will accept up to 12 AWG wire, you can have longer speaker runs with lower loss and better damping, improving your sound.
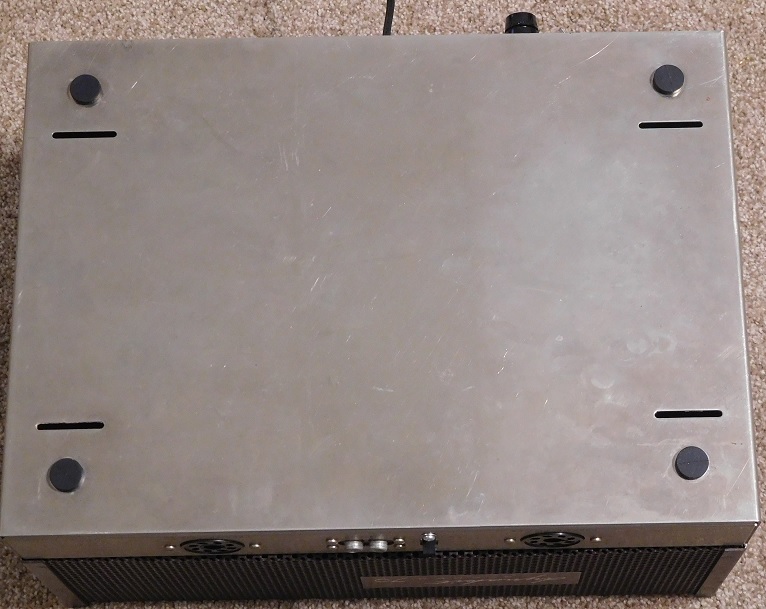
If your Dynaco is original, the Vinyl/rubber feet on the bottom are 40+ years old. In that time, they dry out and fall to pieces. These replacement feet fit pretty much all the Dynaco equipment. PAS-3, PAT-4, Stereo 120, SCA-80...everything you can think of. Replacing the feet is quite easy if your Dynaco feet are held on with screws. It's a lot more work if the feet are held on with rivets. The FFT replacements fit perfectly, except they're a bit taller than the original feet. The picture shows two original feet, surrounded by four of the taller feet. The increased height is typically a benefit, as it allows better air circulation, reducing operating temperature and enhancing component life.

It seems like everyone has a Dynaco that's missing a screw! Here's a set of 5 screws, enough to replace all the original sheet metal screws that hold the cover on a typical Dynaco. The picture compares an original screw which the new screw. Note that the new screws have a brighter finish than the typical stock screws.
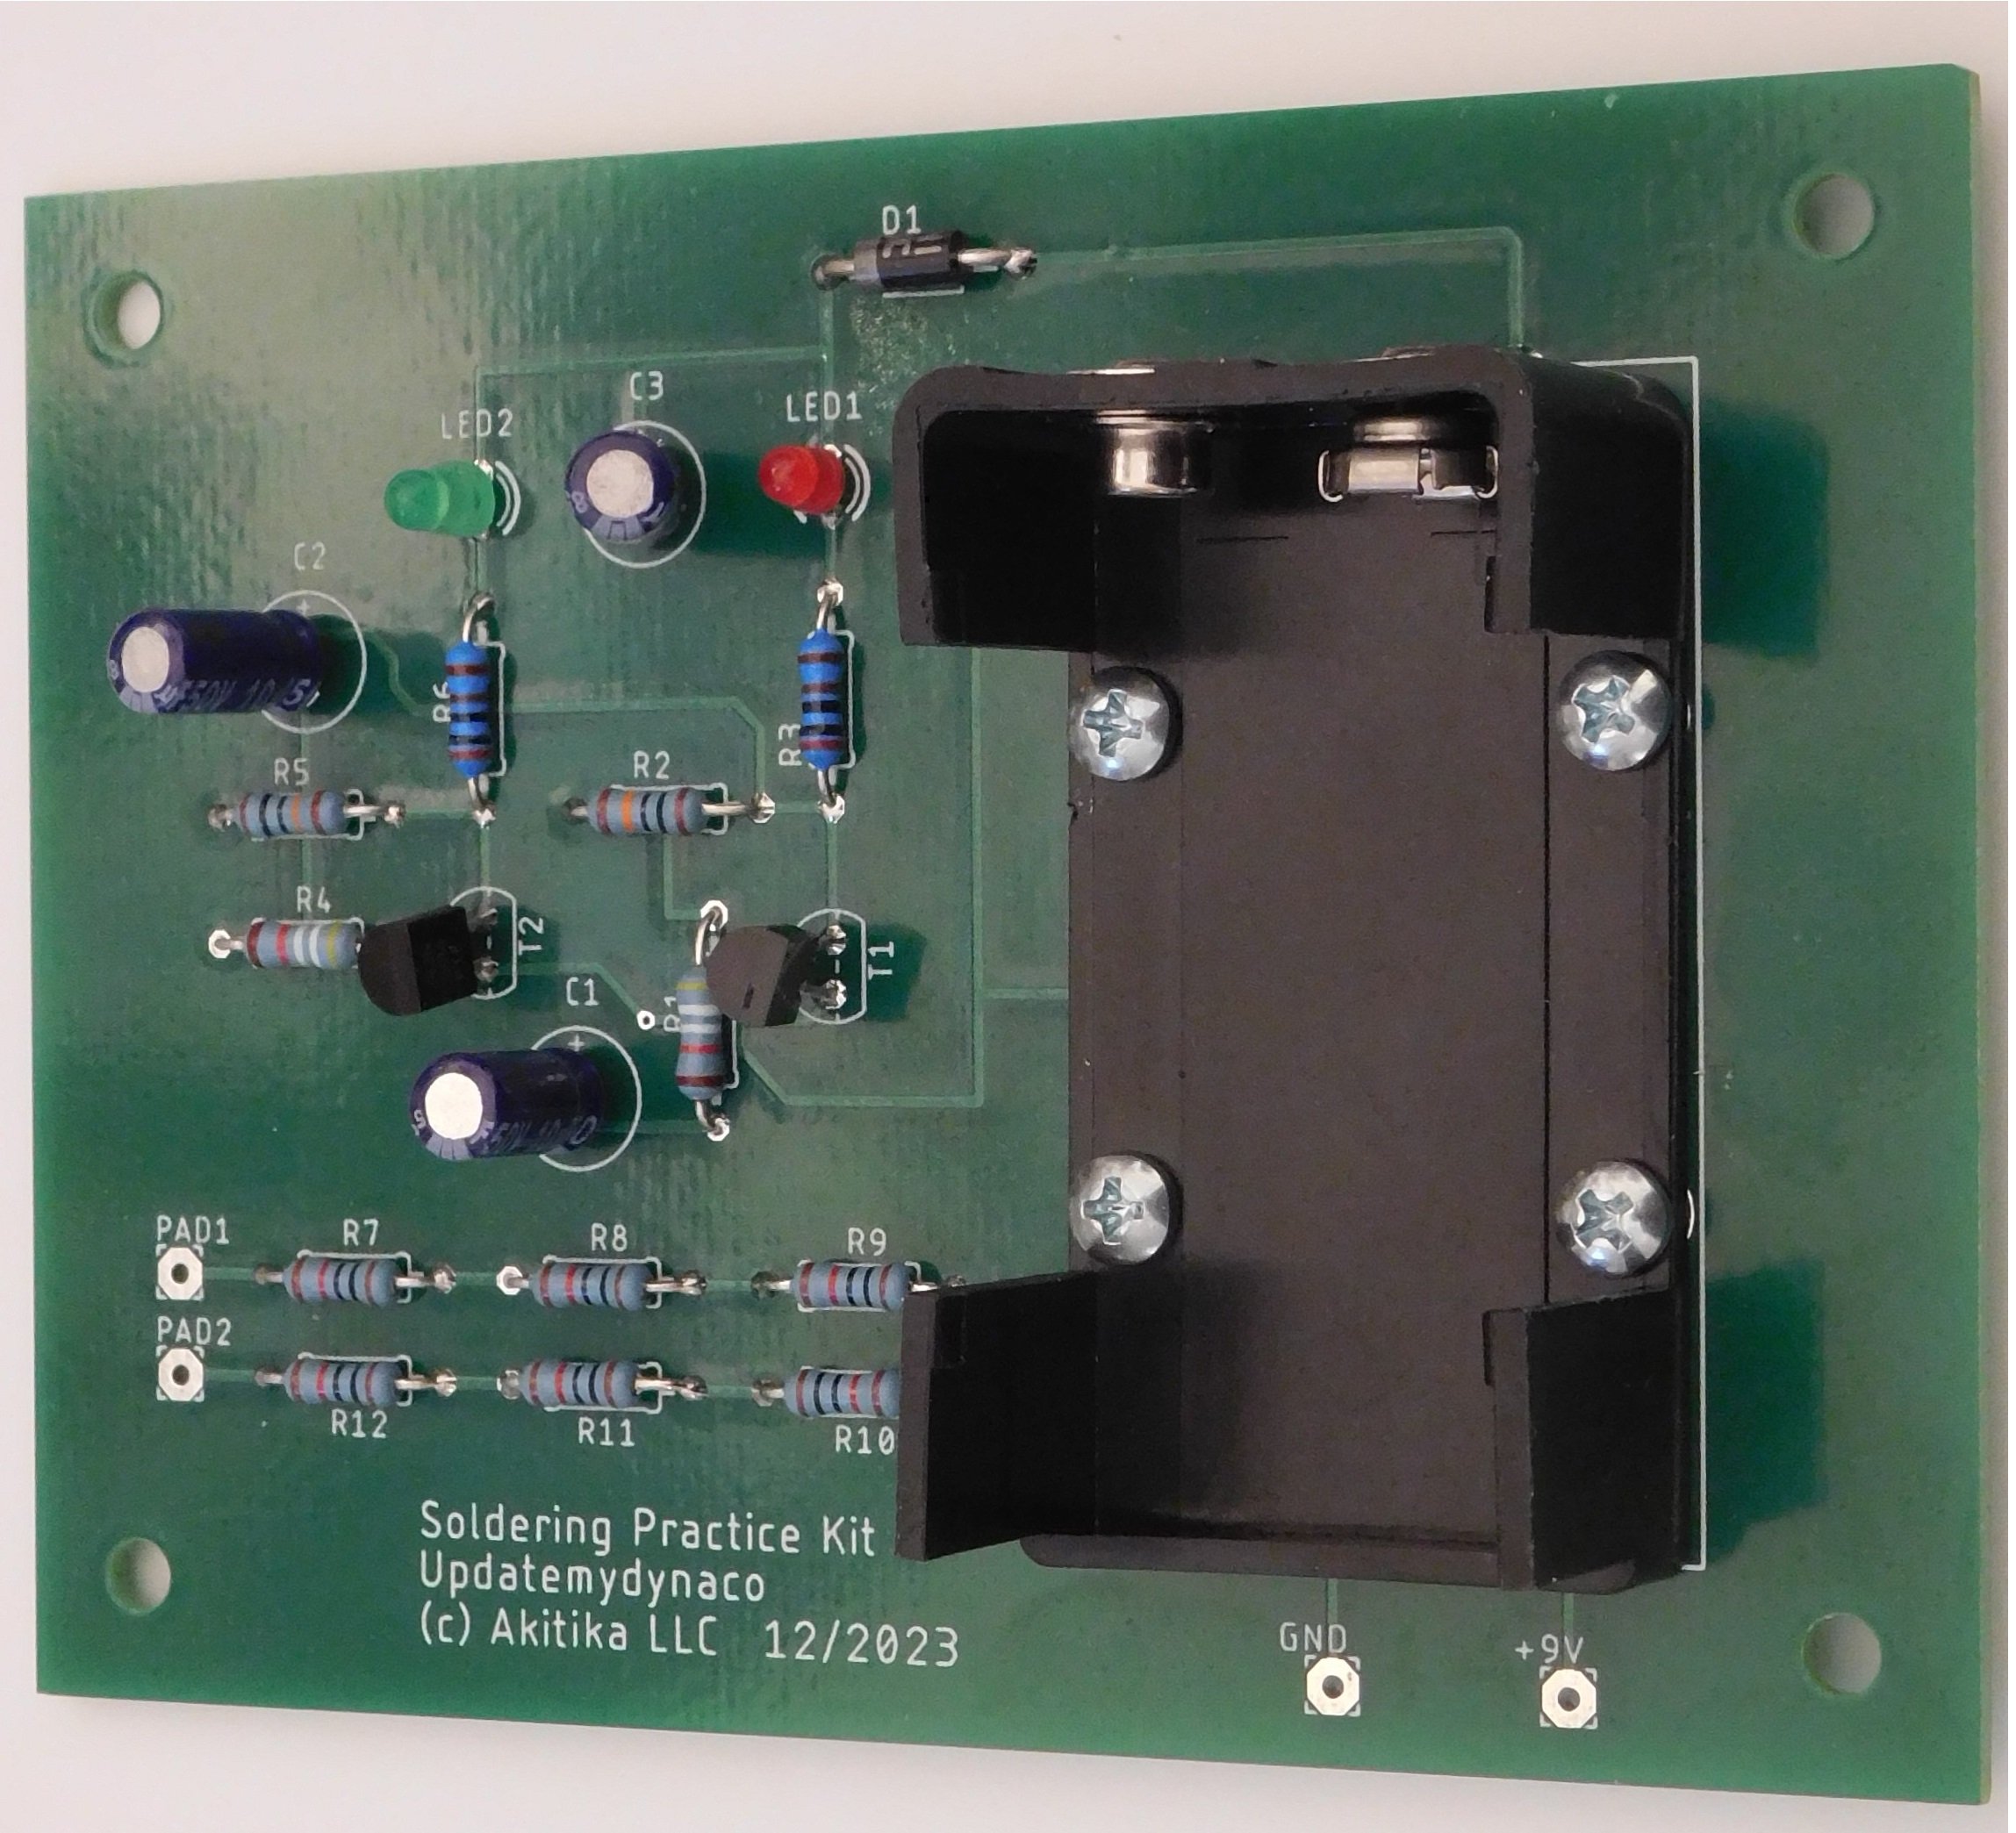
Let's say that it has been a while since you soldered...Or that you've read about soldering, but still have't done it! Try out your new soldering iron and your new skills with this soldering practice kit. It has a specially designed PCB (printed circuit board) that allows you to check your technique. This also gets you familiar with using an ohmmeter (not provided). At that point, you're ready to build a red/green blinker circuit. That will get you familiar with polarized capacitors, diodes, transistors, LEDs (light emitting diodes), and mechanical assembly. These are all the skills you'll need to build one of the larger kits at the Updatemydynaco or Akitika web sites. While the kit requires a 9 volt battery (not included), it does include:
You should also check out this soldering tutorial video
This is a great introduction to electronics construction for anyone bitten by the bug, but looking for a skill and confidence builder before jumping in to deeper waters
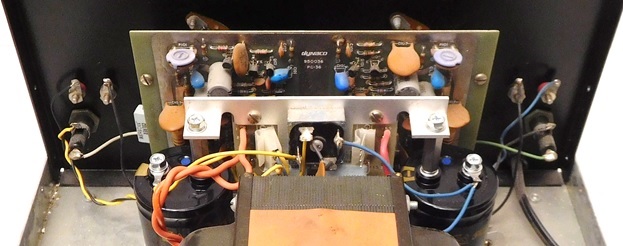
You can upgrade your Stereo 150's power supply capacitors. Why would you do that? If your Stereo 150's power supply capacitors have lost capacitance, you could have extra hum. You could be missing out on low frequency power. Since these new caps are about twice the capacitance of the original caps, you can even get lower hum and more output power than with the stock capacitors. The new caps are the same diameter as the old, so they drop right in. We include specially sized stand-offs to make for a smooth, mechanically compatible installation. The kit includes two 22000 uF 80 volt capacitors and the standoffs.
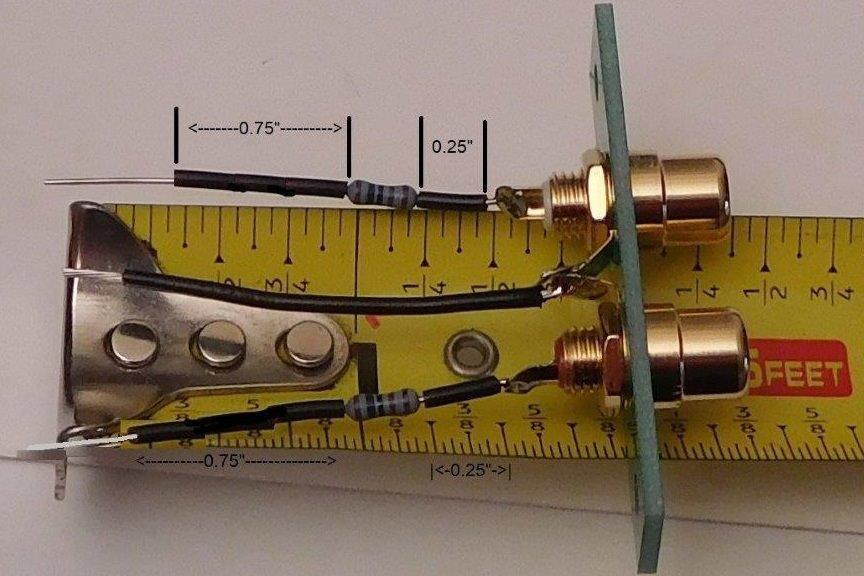
You can upgrade your Stereo 150's RCA jacks. 40+ years can wreak havoc on the metal on the original jacks. Replace them with new gold plated jacks. You'll get much better connections, that can lead to lower noise and better clarity.

If your Stereo 70 is humming more than it used to, it might be that the capacitors in the bias supply have lost capacitance. This kit provides a neat way to upgrade that supply using capacitors twice as big as the original, dramatically reducing hum generated by the bias supply. It's also a lot neater than the original. To top it all off, the new PCB has a ground plane for absolute lowest noise. This kit is a great way to upgrade the bias circuit in your Stereo 70.
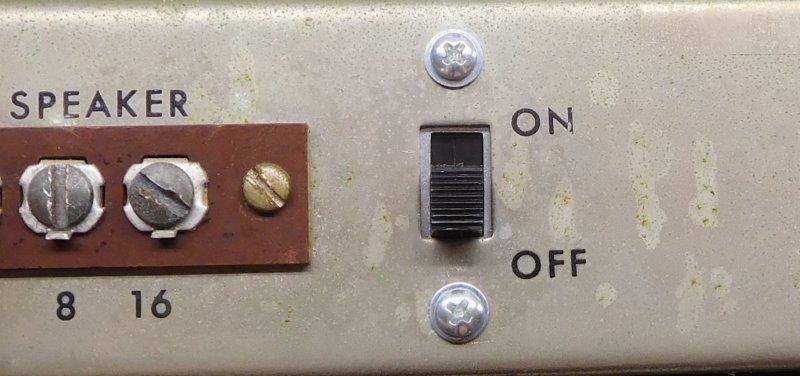
Has your power switch gotten stiff or flaky? Here's a replacement that will drop right in. You'll notice that the new hardware is a little different, but the nice shiny new screws will blend seamlessly if your Stereo 70 is cosmetically better than mine!

Has your mono switch gotten stiff or noisy? Here's a replacement that will drop right in. You'll notice that the new hardware is a little different, but the nice shiny new screws will blend seamlessly if your Stereo 70 is cosmetically better than mine!
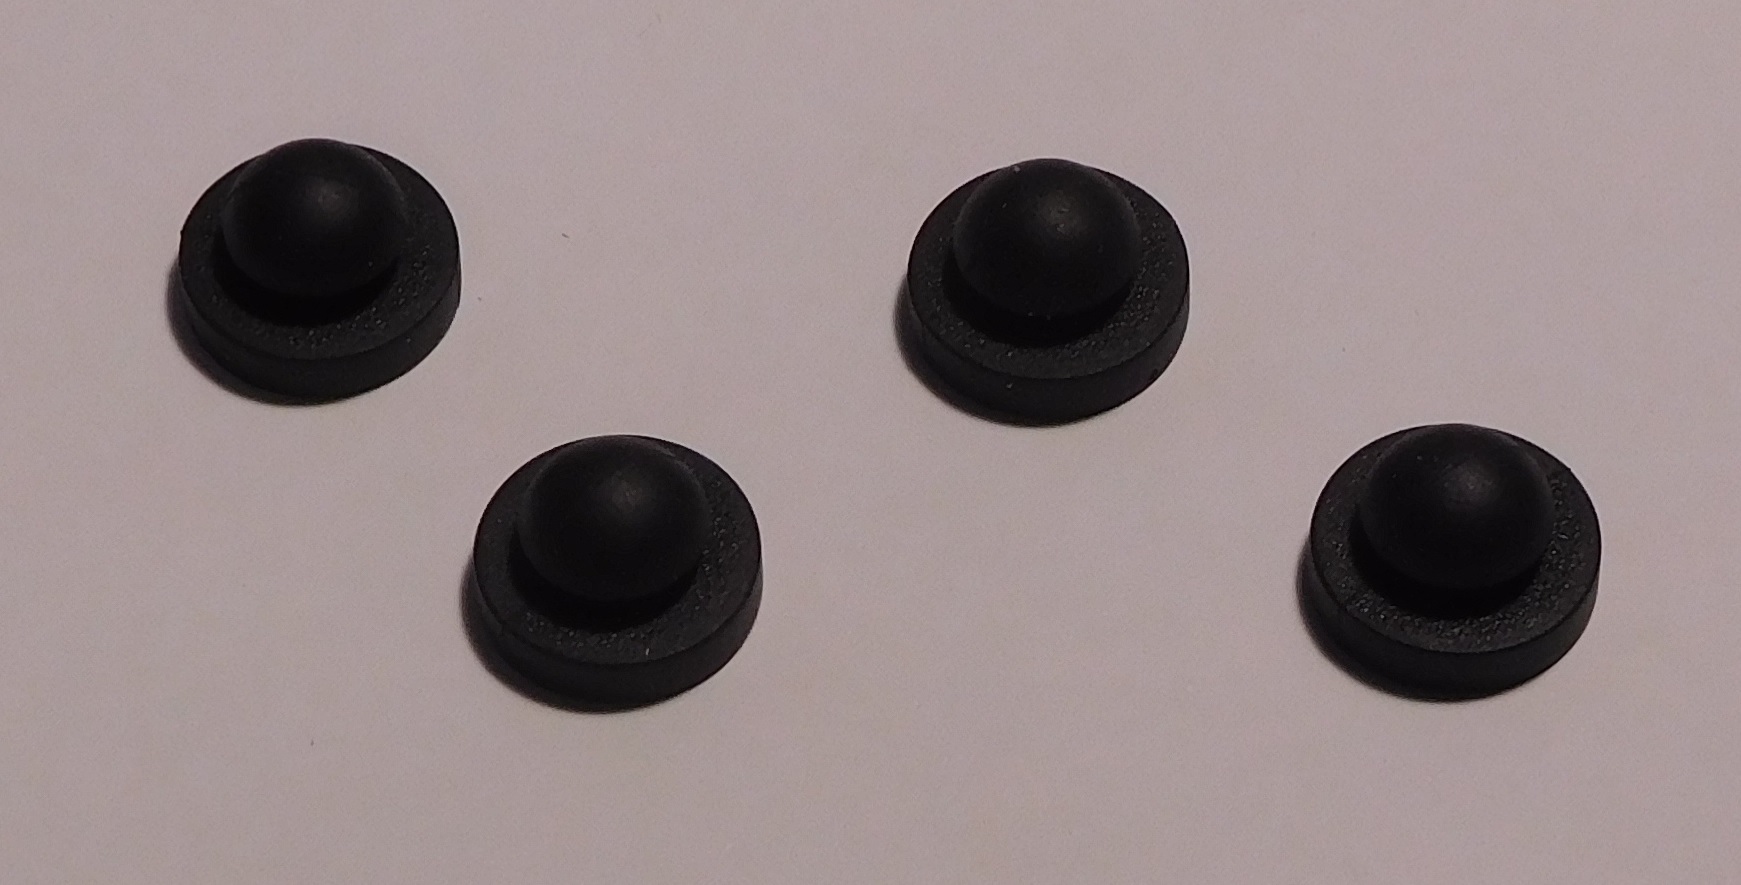
The original rubber feet helped isolate power transformer vibrations from the shelf that the Stereo 70 sits on. Through the years, a few of the rubber feet have probably gone missing from your Stereo 70. This kit has 4 brand new replacement rubber feet. Just remove whichever of the four original feet still remain and work these new feet into the original mounting holes.
In the lower 48 states, we typically use USPS priority mail or first class mail for small packages. Larger packages, like the GT-102 and PR-102, are shipped using UPS ground.
Small packages, under 4 pounds in total weight, ship by First Class International Mail. Larger packages go by Priority Mail International, which takes 6-10 business days. Extra charges are typically involved in international shipments. If this is the case, I will send you a Paypal invoice to cover the international shipping delta. Once this invoice is paid, your order will ship. Our international customers are responsible for paying any applicable duties on their shipments. Here's a link that you can use to estimate the additional country specific charges that you might have to pay.
The Customs Forms require your phone number! Please send your phone number in an email to dan@updatemydynaco.com along with your order. We will contact you and work out the additional charges that may be required for international shipping.
There are so many options for international shipping that we handle it on a case by case basis. If you're an international customer, we'll calculate if there is a required delta in shipping cost above domestic (United States) rates. You can pay that delta by selecting the correct value from the above International Shipping Delta pull-down menu, then click the the "add-to-cart" button. If you prefer, we can also invoice you separately for the delta in cost for international shipping.